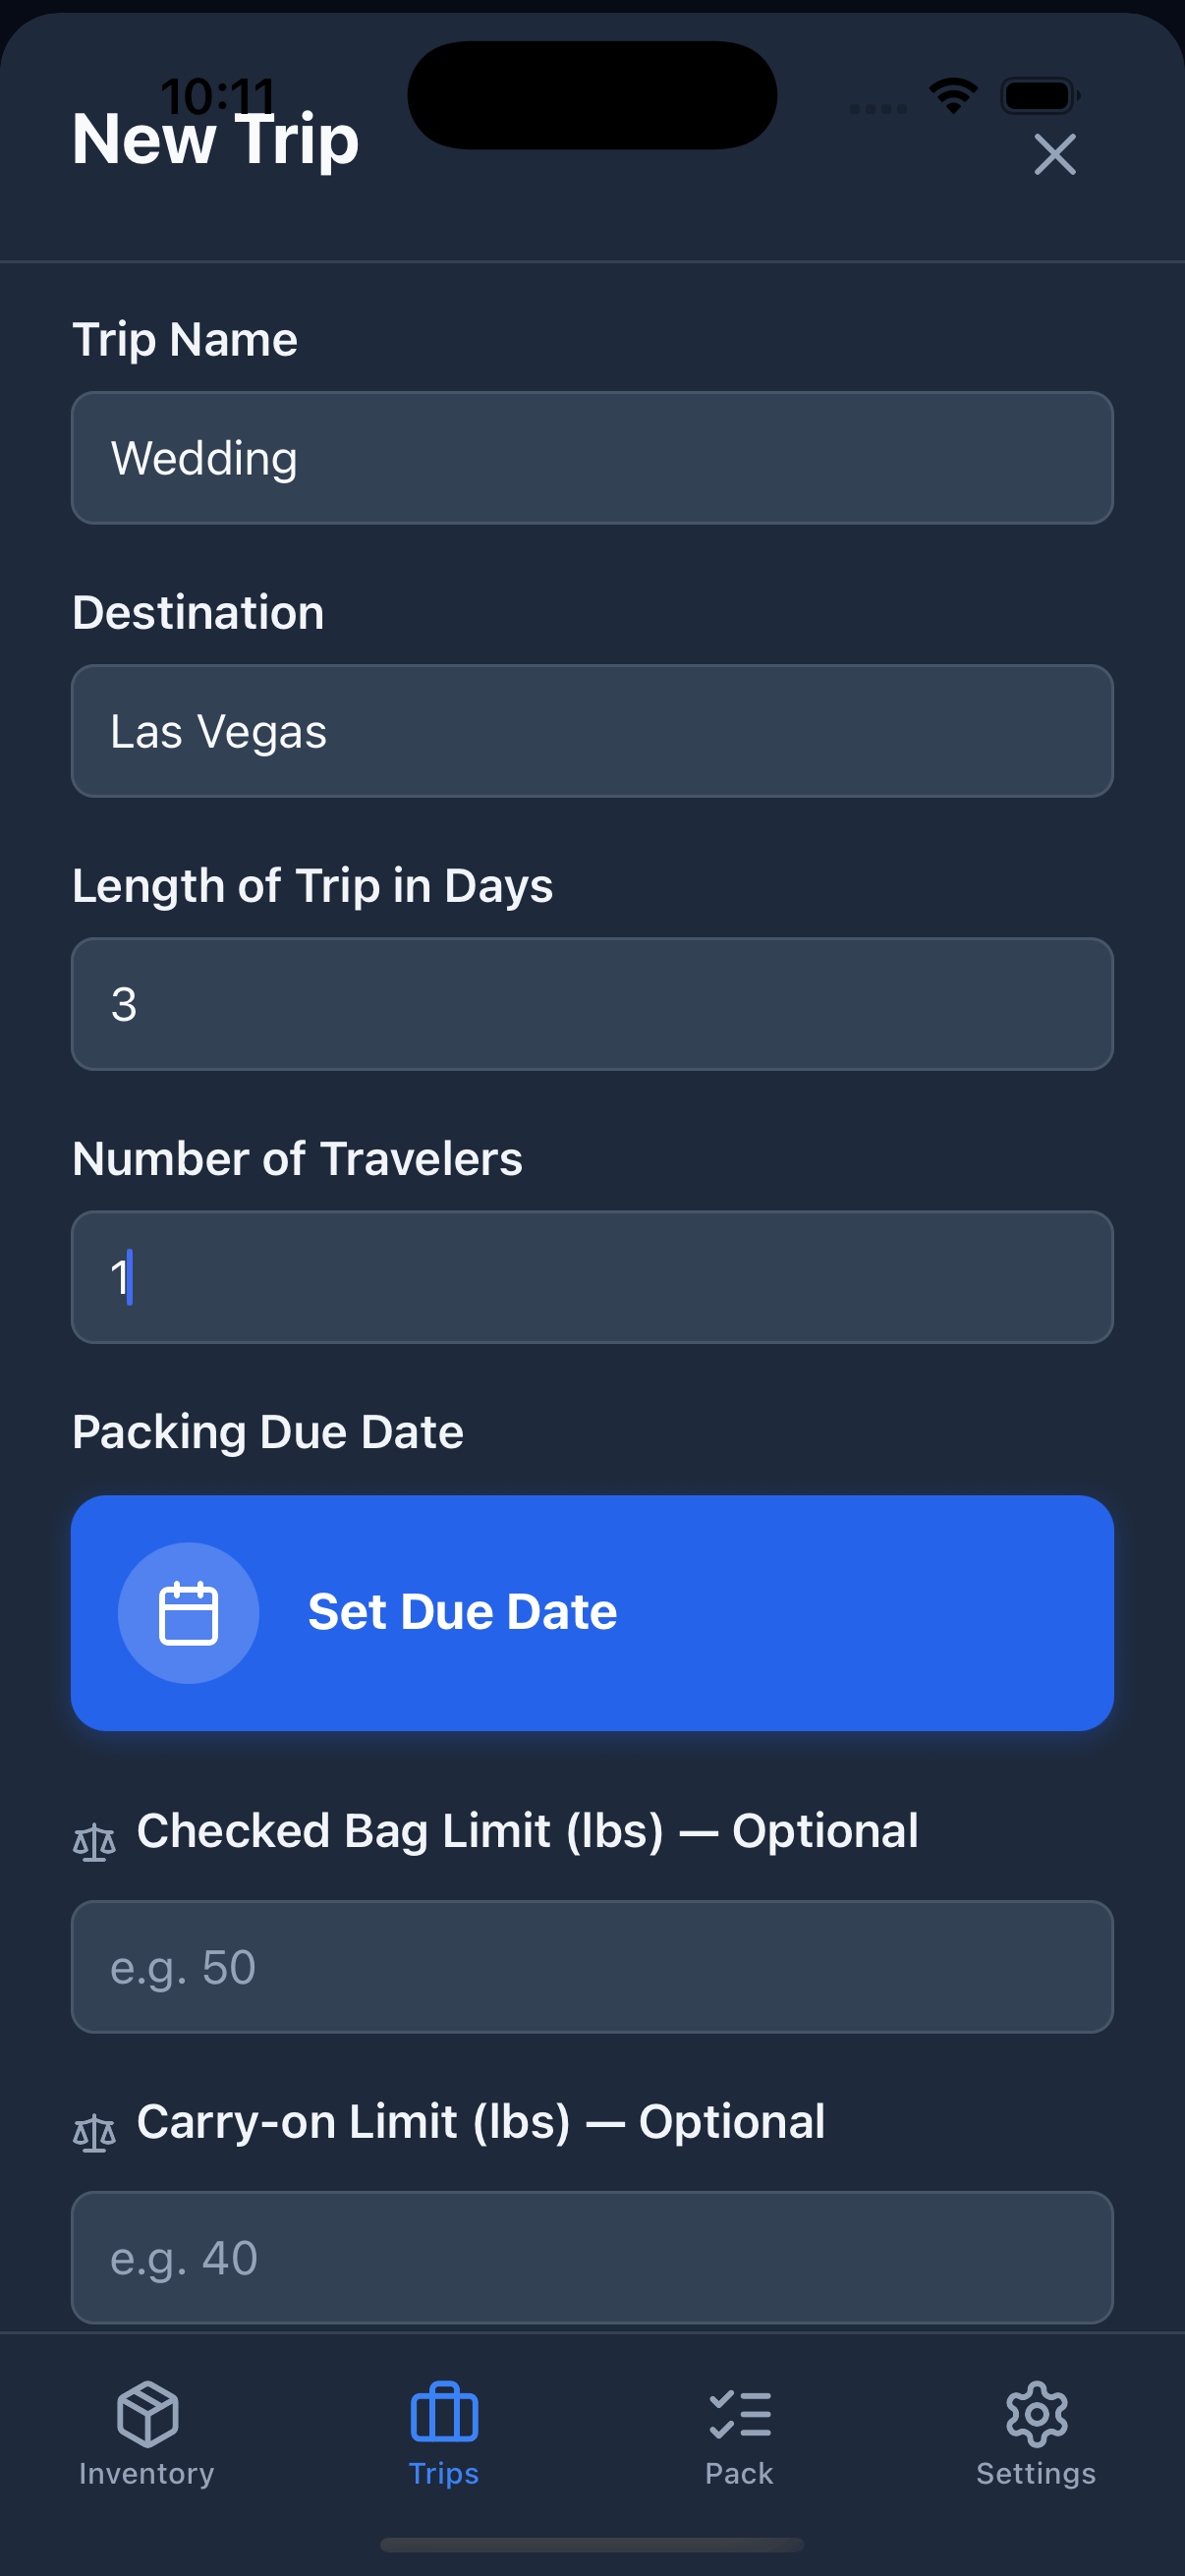
Creating a Trip
- Open the Trips tab.
- Tap the + button (or New Trip).
- Fill in the details:
- Tap Create Trip.
Trip Status
Every trip moves through a lifecycle:
Change a trip’s status from the ⋯ menu on the trip card. The Trips tab lets you show/hide archived trips to keep things tidy.
Only one trip can be Active at a time. Setting a new trip as Active automatically moves the previous active trip back to Planning.
Archived trips are hidden by default. Tap Show Archived on the Trips screen to see them, and use Restore from the menu to bring one back to Planning.
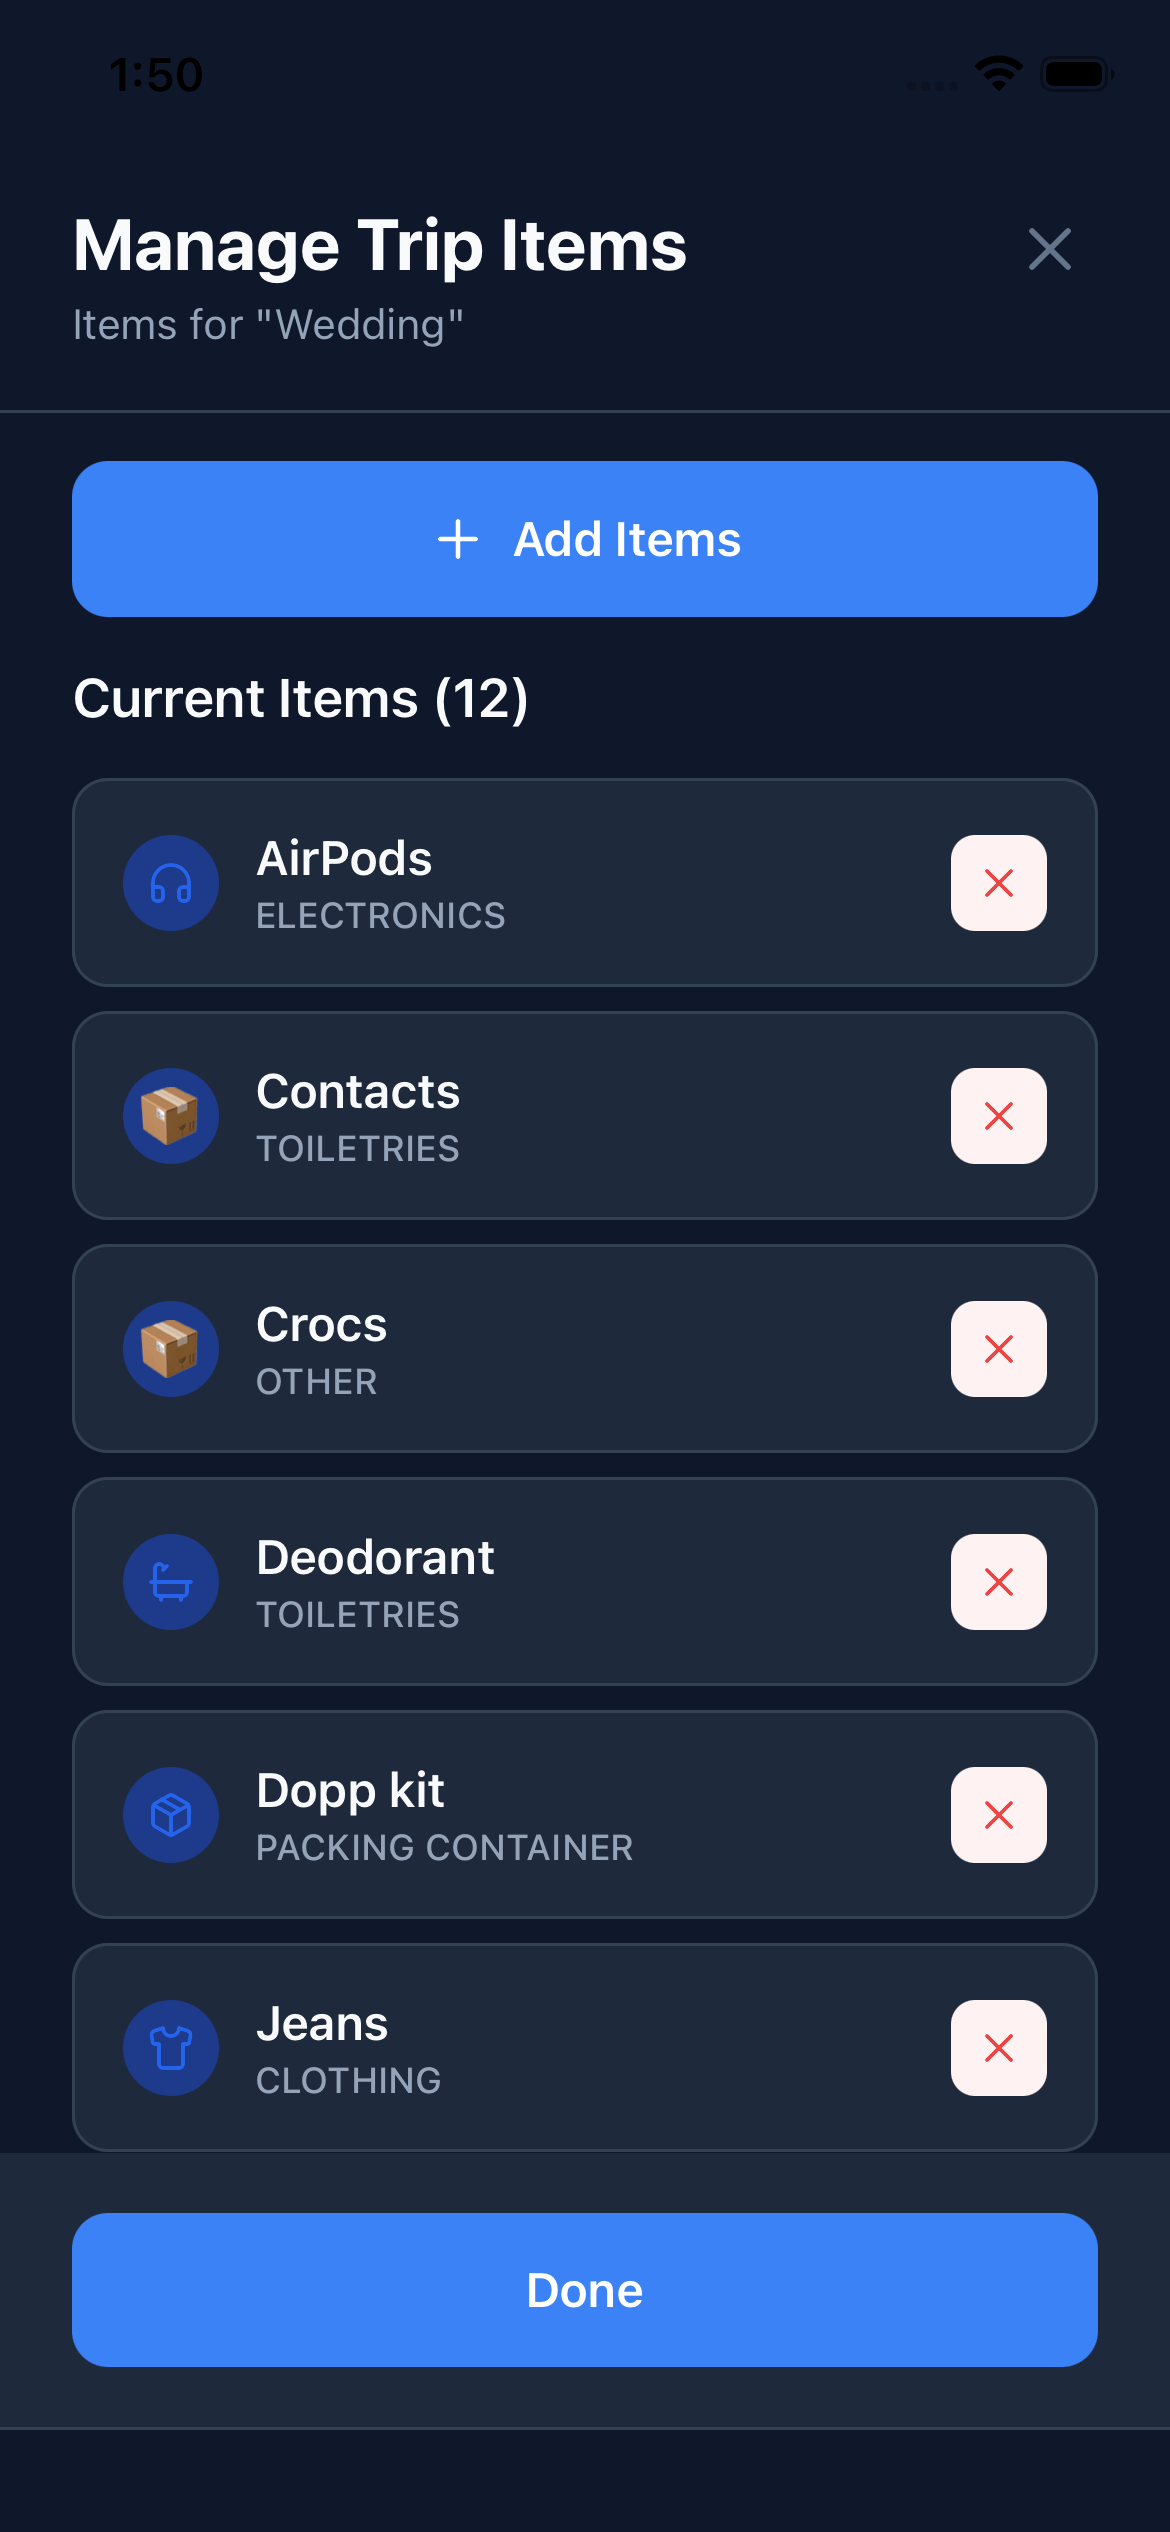
Adding Items to a Trip
- Open a trip.
- Tap Add Items.
- Browse your inventory and select the items you want to bring.
- Tap Done.
Containers
Containers let you organize items inside your trip, just like physically packing things into bags. Any inventory item with the Packing Container category can be used as a container (suitcase, backpack, packing cube, tote, etc.).Adding a Container
- Add the container item to your trip just like any other item.
- Once added, other items can be assigned to it.
- In the packing list, drag items under the container header, or use the move option.
Nested Containers
Containers can be nested inside other containers. For example, a packing cube can sit inside a suitcase.- Maximum nesting depth: 1 level (container within a container)
- Circular nesting is not allowed (A inside B inside A)
The Unassigned Section
Items not assigned to any container appear in an Unassigned section at the bottom of your packing list. This is useful for loose items like a passport or phone charger you keep close at hand.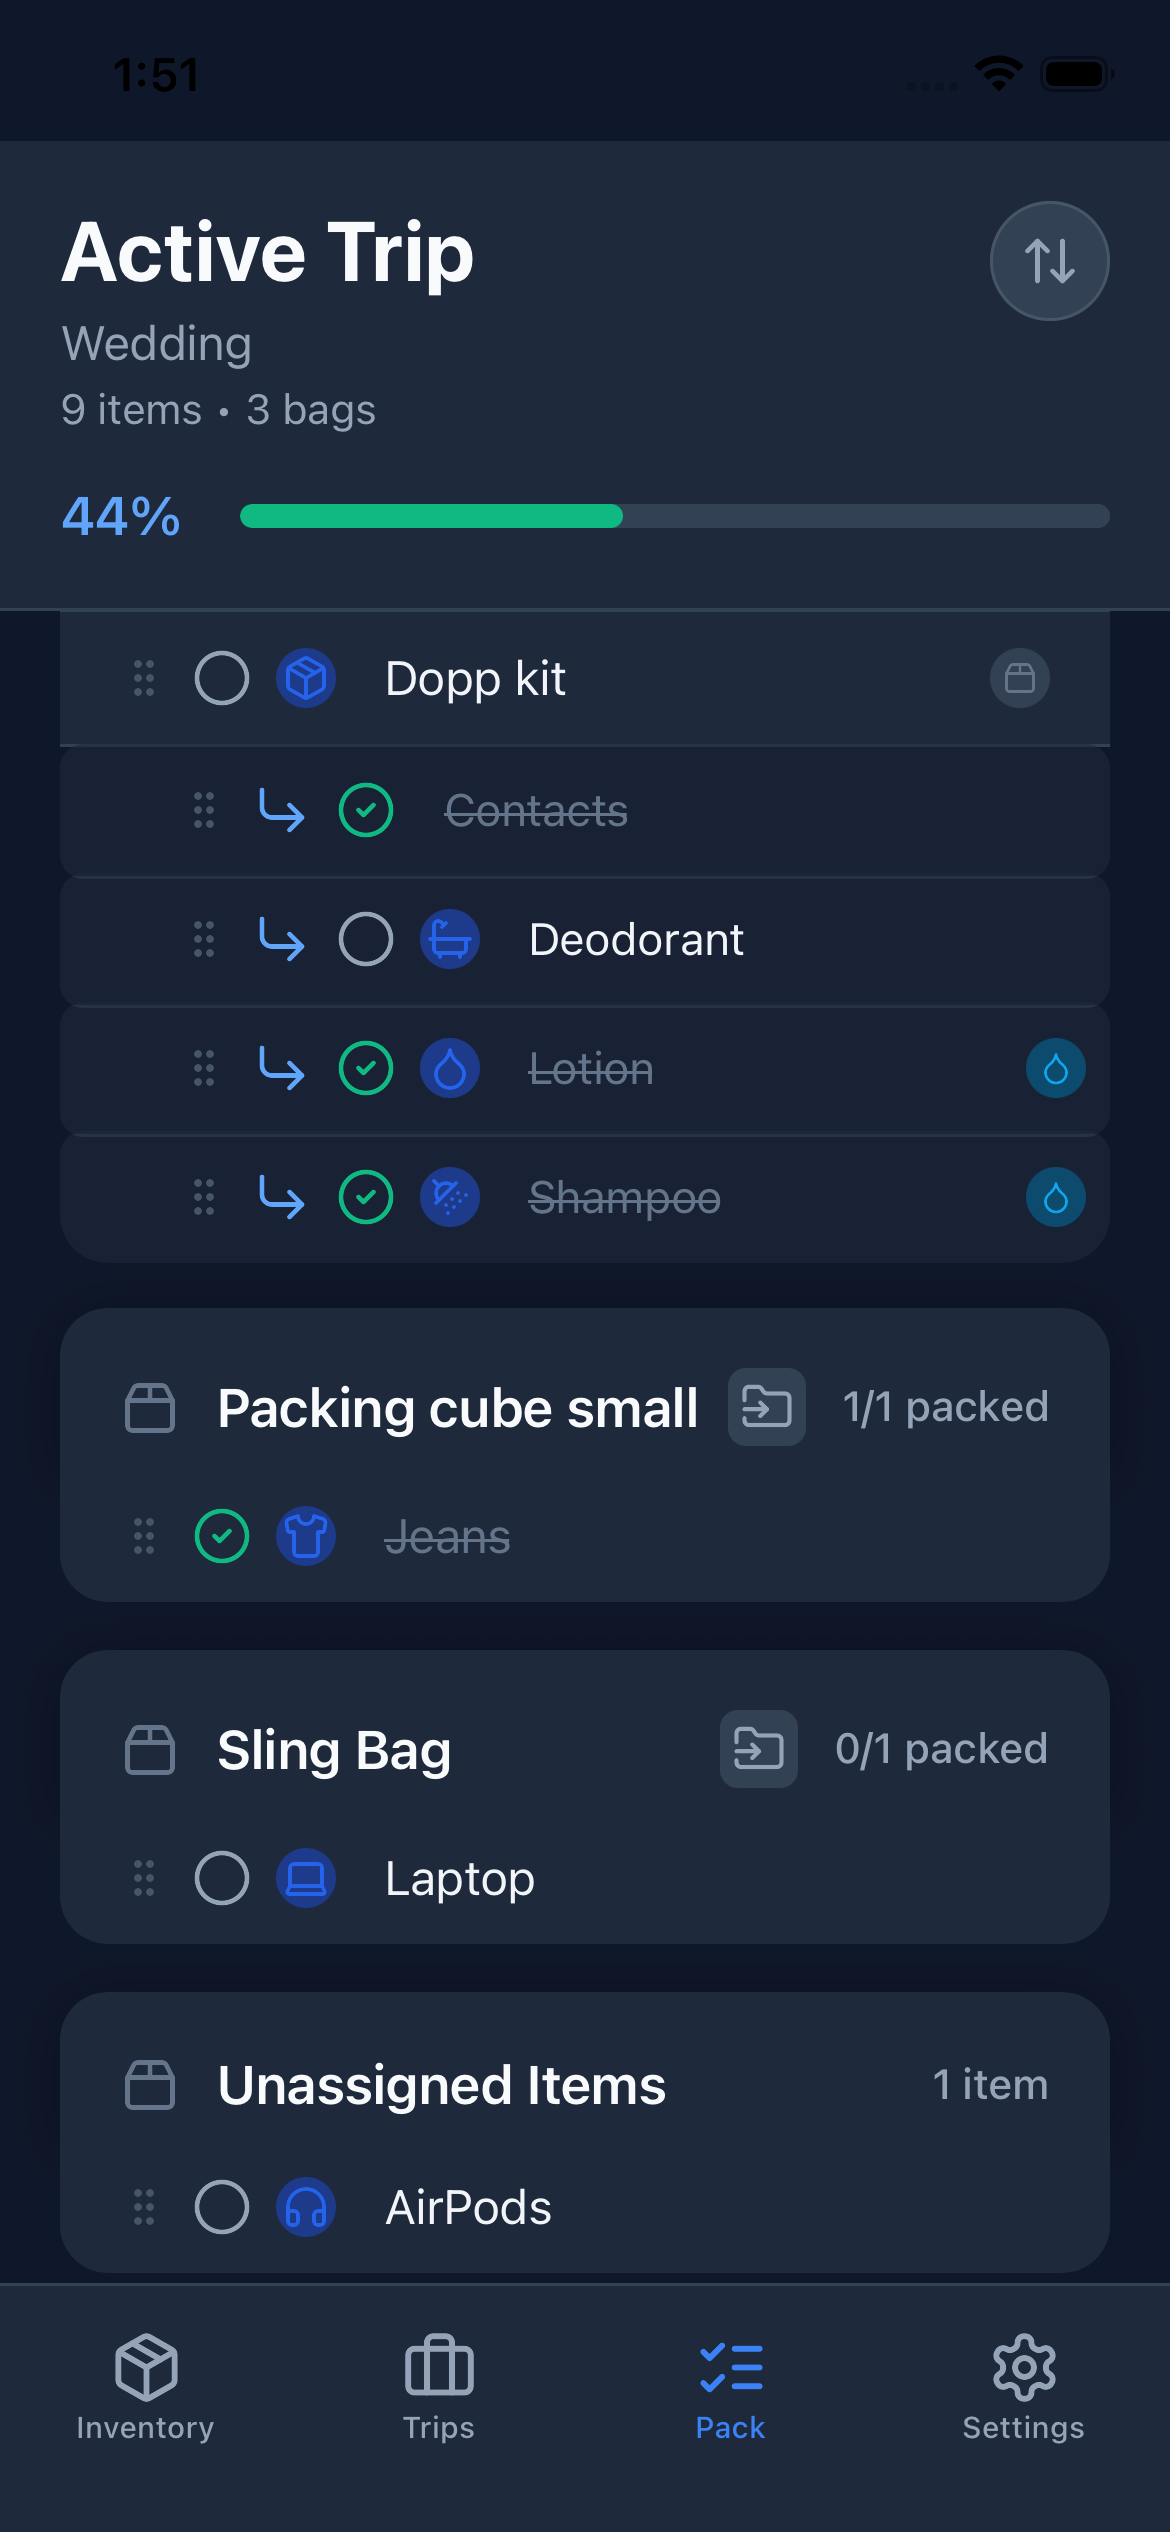
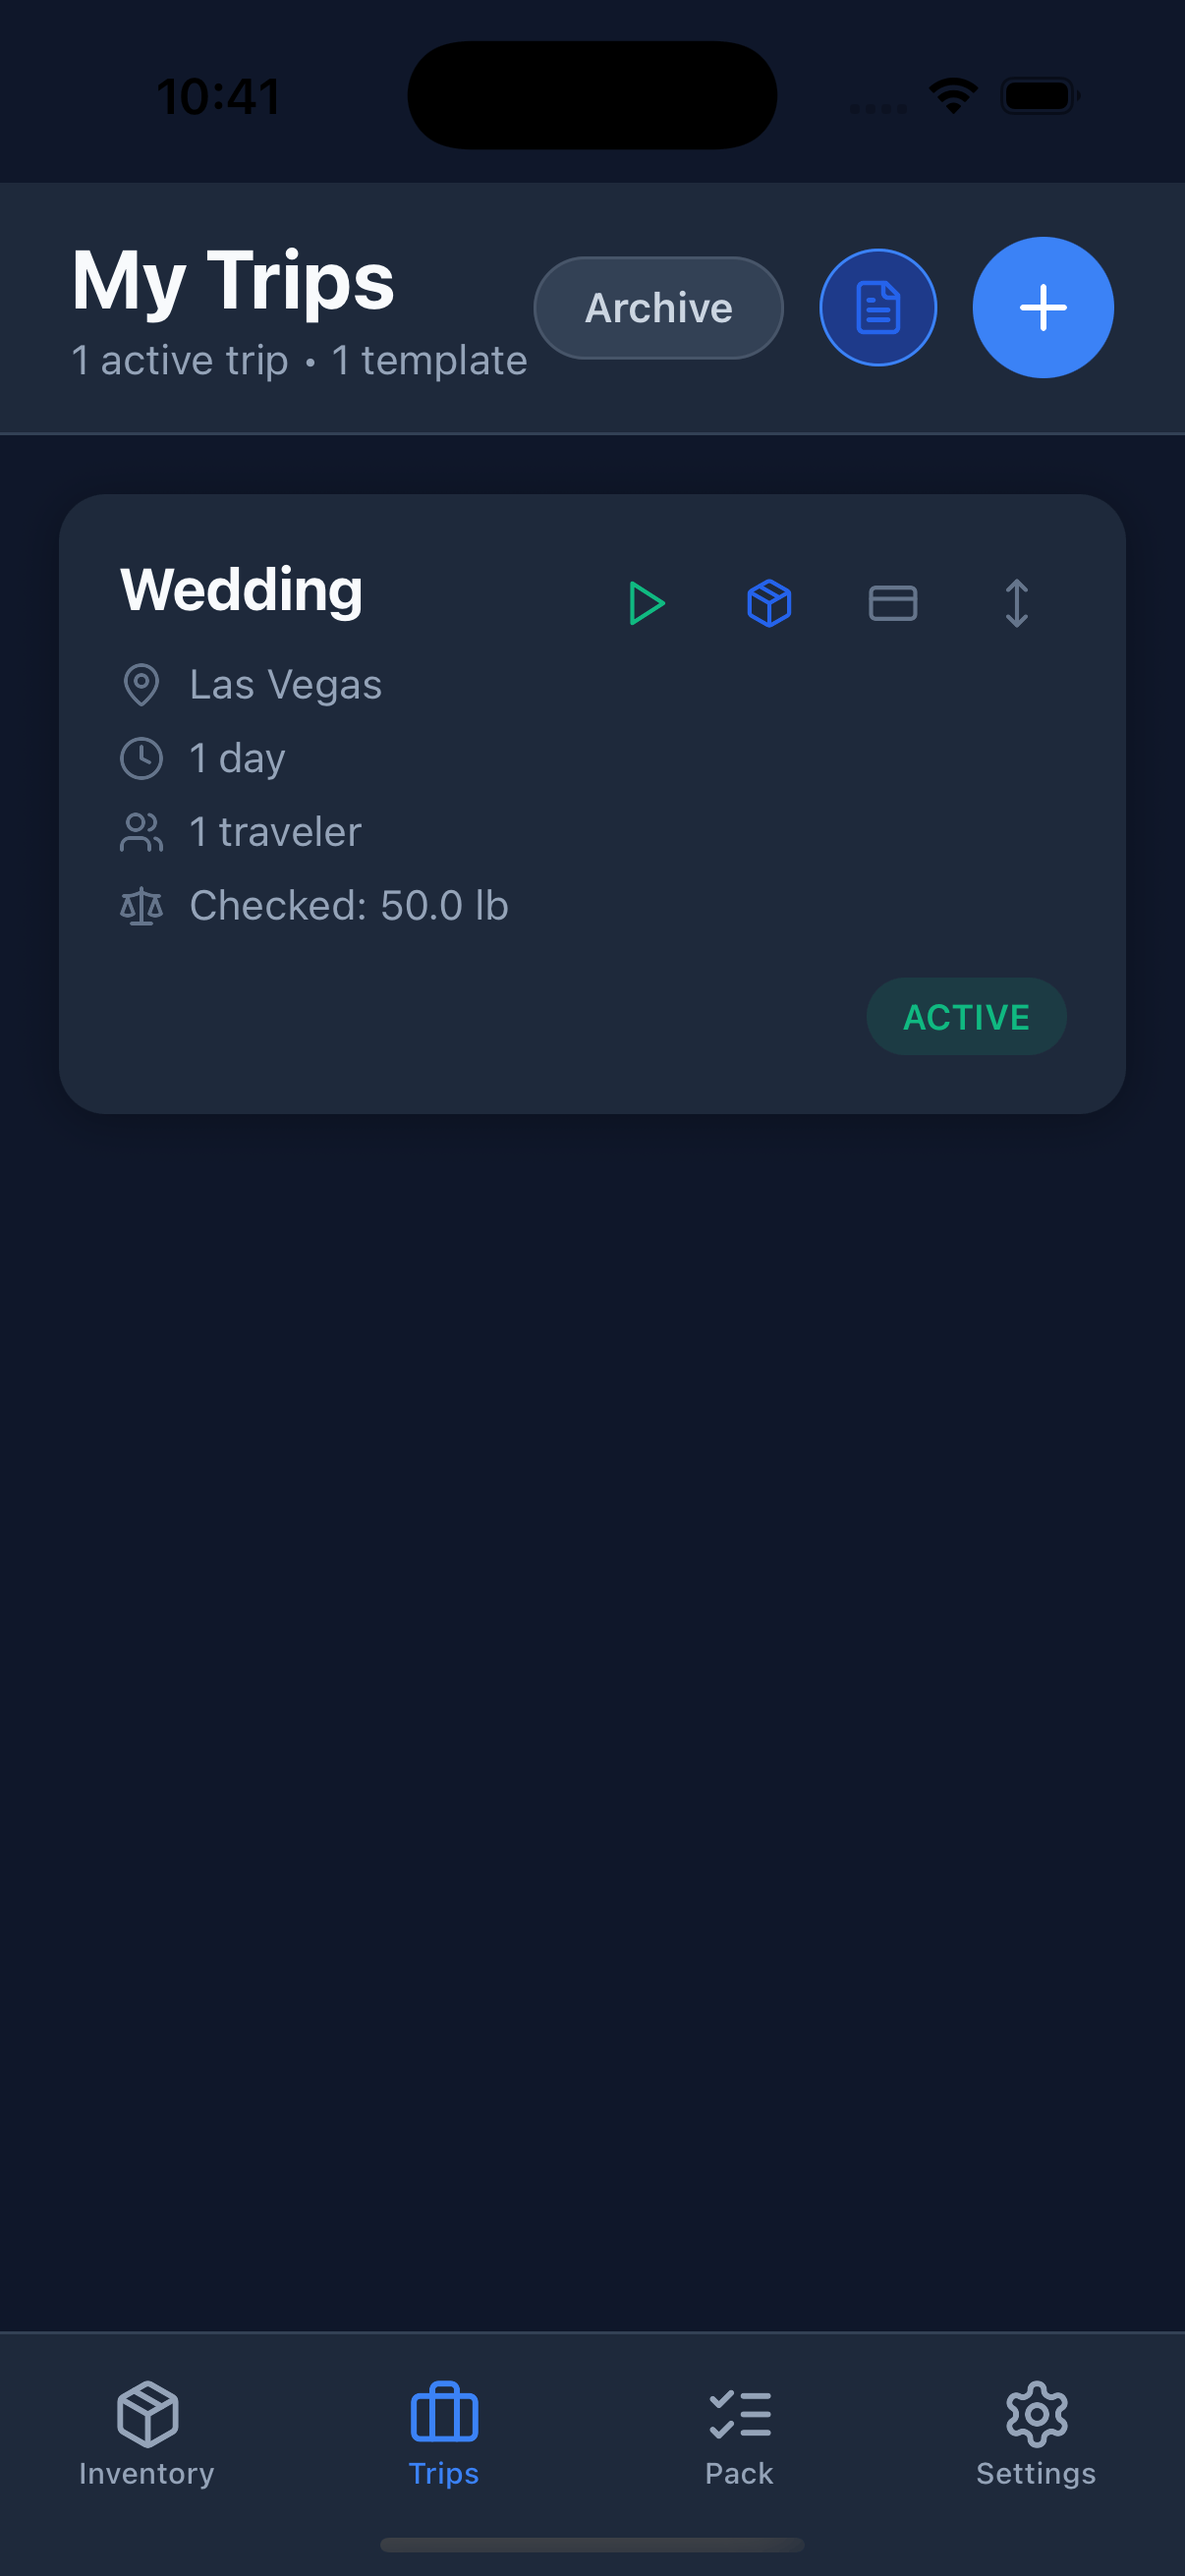
Reading Trip Cards
Each trip card in the Trips tab shows:- Destination and trip length in days
- Number of travelers
- Due date, color-coded by urgency. Red means overdue, orange means due within 24 hours, and green means due in the future.
- Weight caps (if set): your checked bag and/or carry-on limits, shown below the due date. Requires Pro — see Weight Tracking.
- Status badge: Planning (yellow), Active (green), Archived (gray)
- Bell icon: A bell with a line through it means a notification is scheduled.
Reminders
PackKit sends two kinds of push notifications to keep your packing on track. Both require notification permission — if you haven’t granted it yet, go to Settings → PackKit → Notifications and enable them.Due Date Reminder
Set a Due Date on any trip to receive a one-time push notification on that date reminding you to start packing.- Create or edit a trip.
- Set the Due Date field.
- Tap Save.
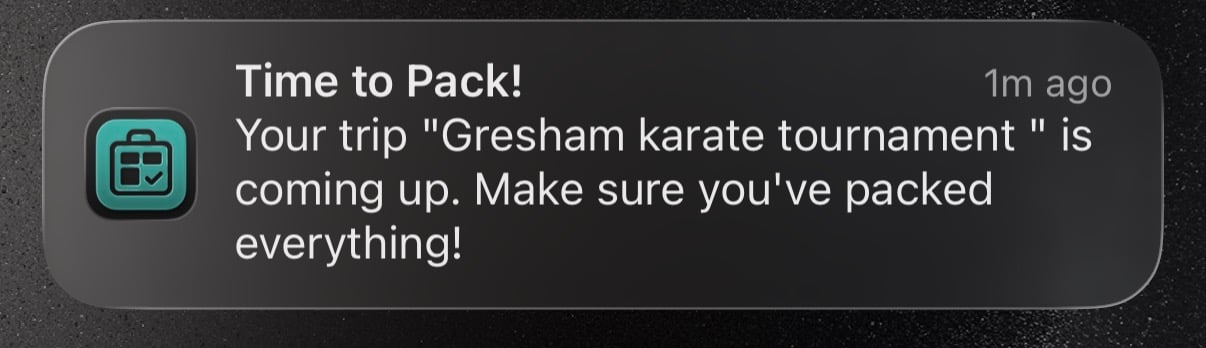
Departure Reminders
When a trip has a start date, PackKit automatically schedules two departure reminders:
The notification body shows your current packing progress — for example, “You’re 60% packed — tap to finish up.” Each time you check or uncheck an item, the reminders are rescheduled so the percentage stays accurate. If you’ve packed everything, the reminders are skipped automatically.
Departure reminders are cancelled when you delete a trip. If you change the trip’s start date or name, the reminders update automatically.
Sharing a Trip Pro
Share a read-only snapshot of your packing list with travel companions — no account or app required. Anyone who has the link can open it in a browser.Creating a Share Link
- On the Trips tab, tap the ⋯ menu on any trip card.
- Select Share Trip.
- PackKit generates a unique link. Tap the link row to open the system Share sheet and send it however you like (Messages, email, copy, etc.).
- Tap Share to open the Share sheet directly.
Revoking a Share Link
- Open the ⋯ menu on the trip and tap Share Trip.
- Tap Revoke Link.
- Confirm the prompt.
What Viewers See
The shared page shows:- Trip name, destination, and dates
- Full packing list, organized by container (read-only — viewers cannot check or uncheck items)
- Which items are checked off at the moment the page is loaded
packkit.me/s and works in any browser.
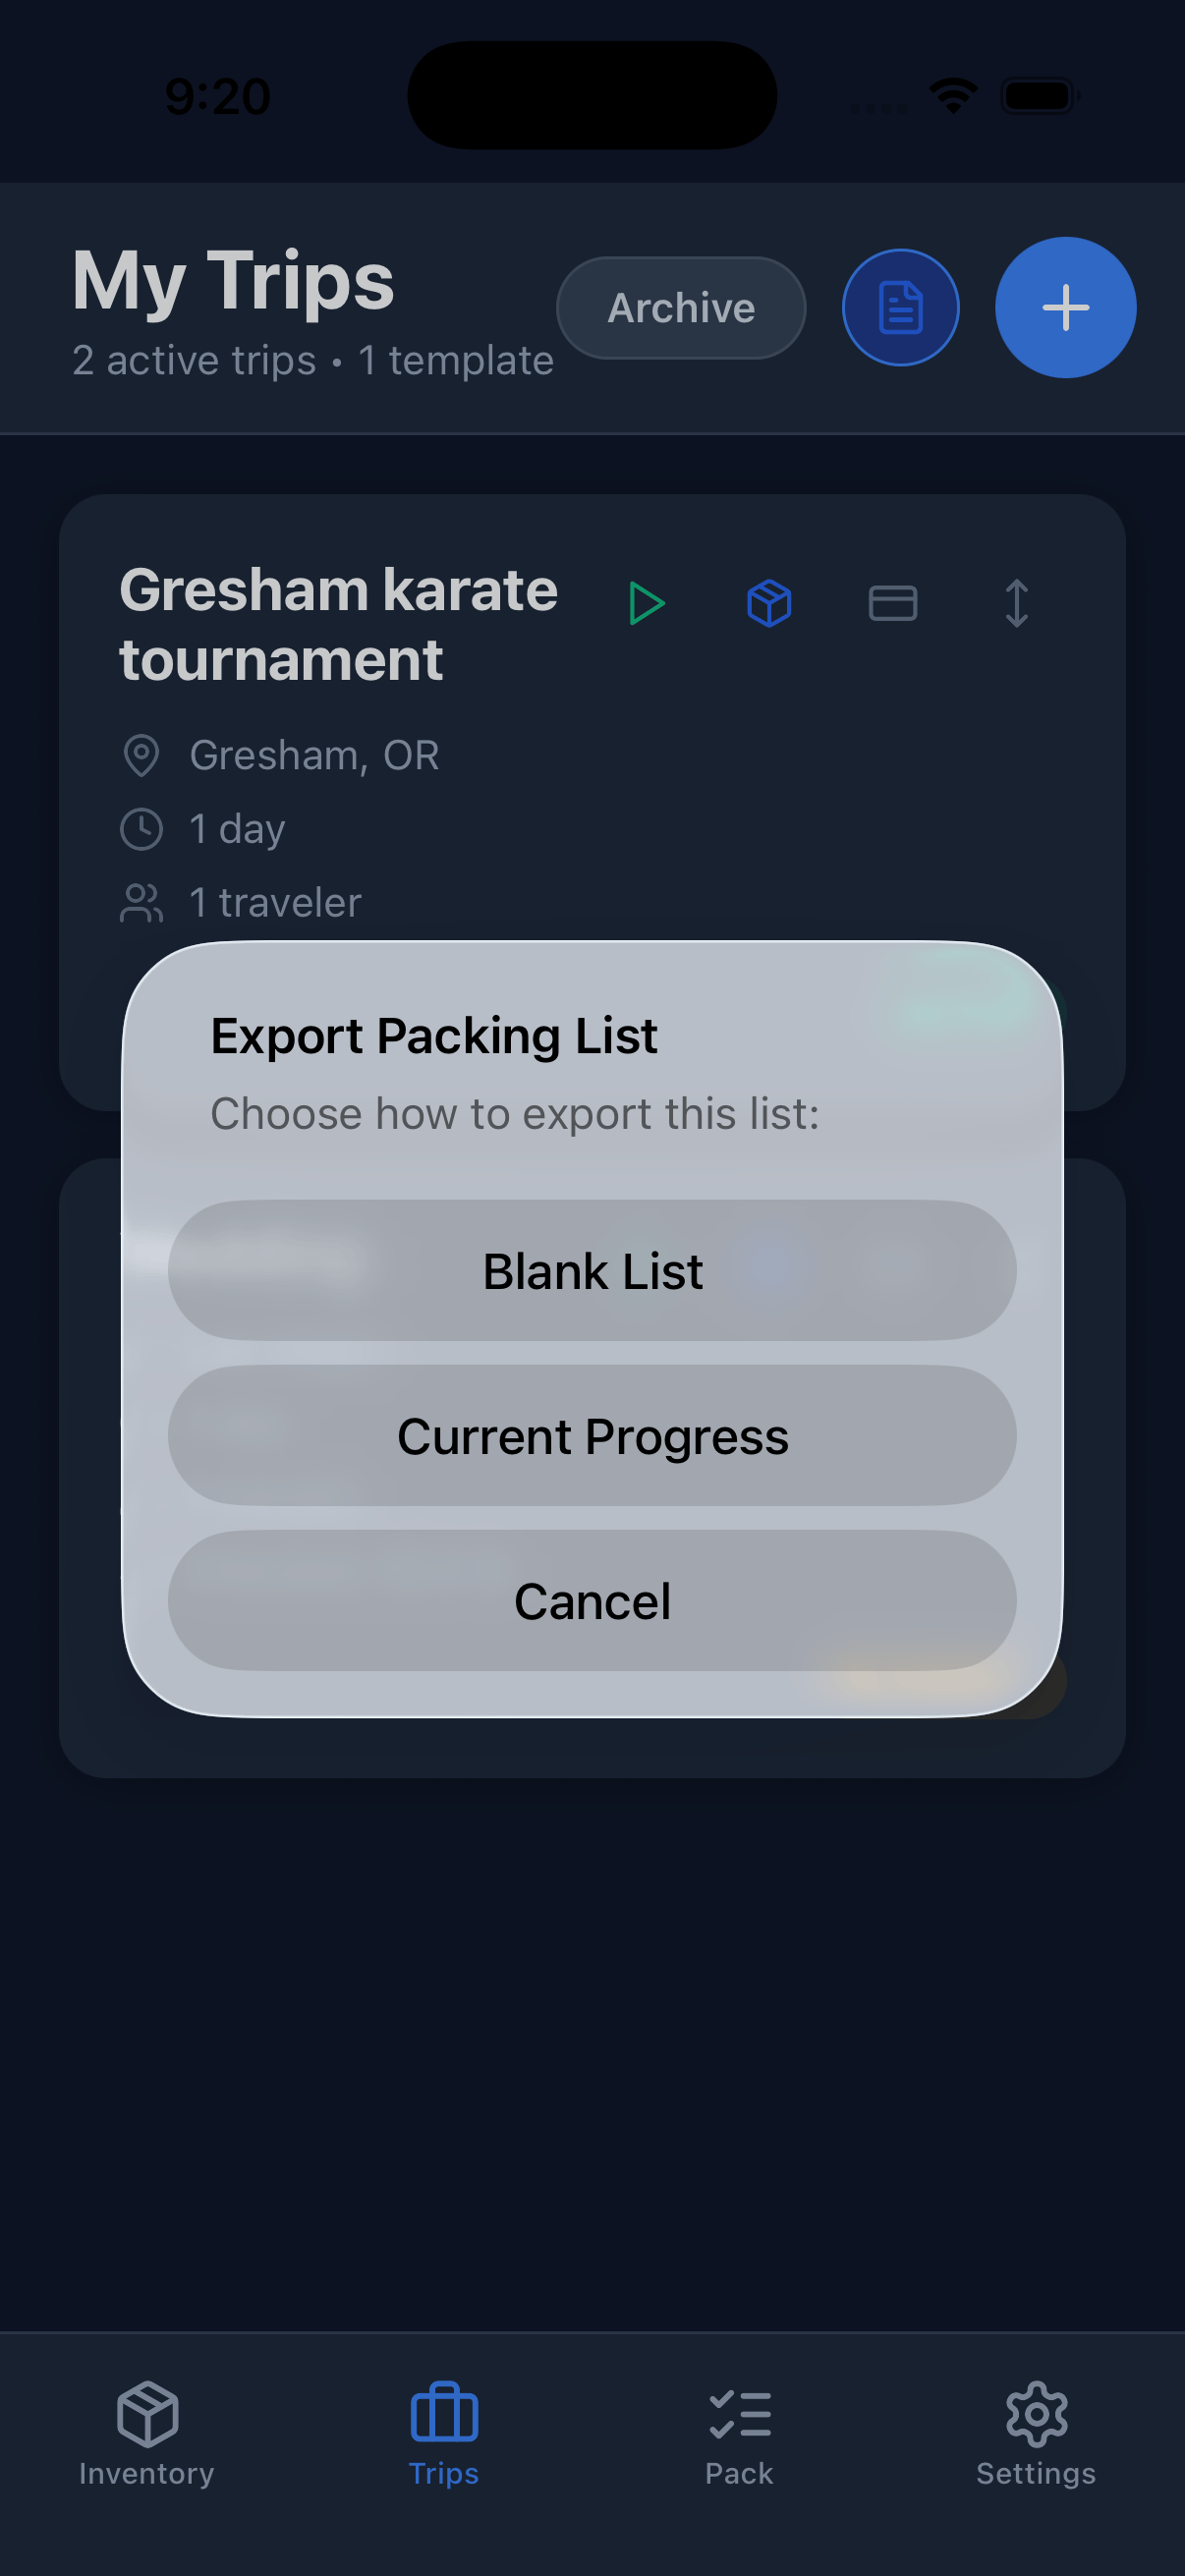
Exporting a Trip Pro
Export any trip’s packing list as a PDF — useful for printing or sharing with someone who doesn’t have the app.- On the Trips tab, tap the ⋯ menu on any trip card.
- Select Export Packing List.
- Choose an export mode:
- Your device’s standard share sheet opens with the generated PDF. Save it to Files, print it, or send it however you like.
Trip Templates
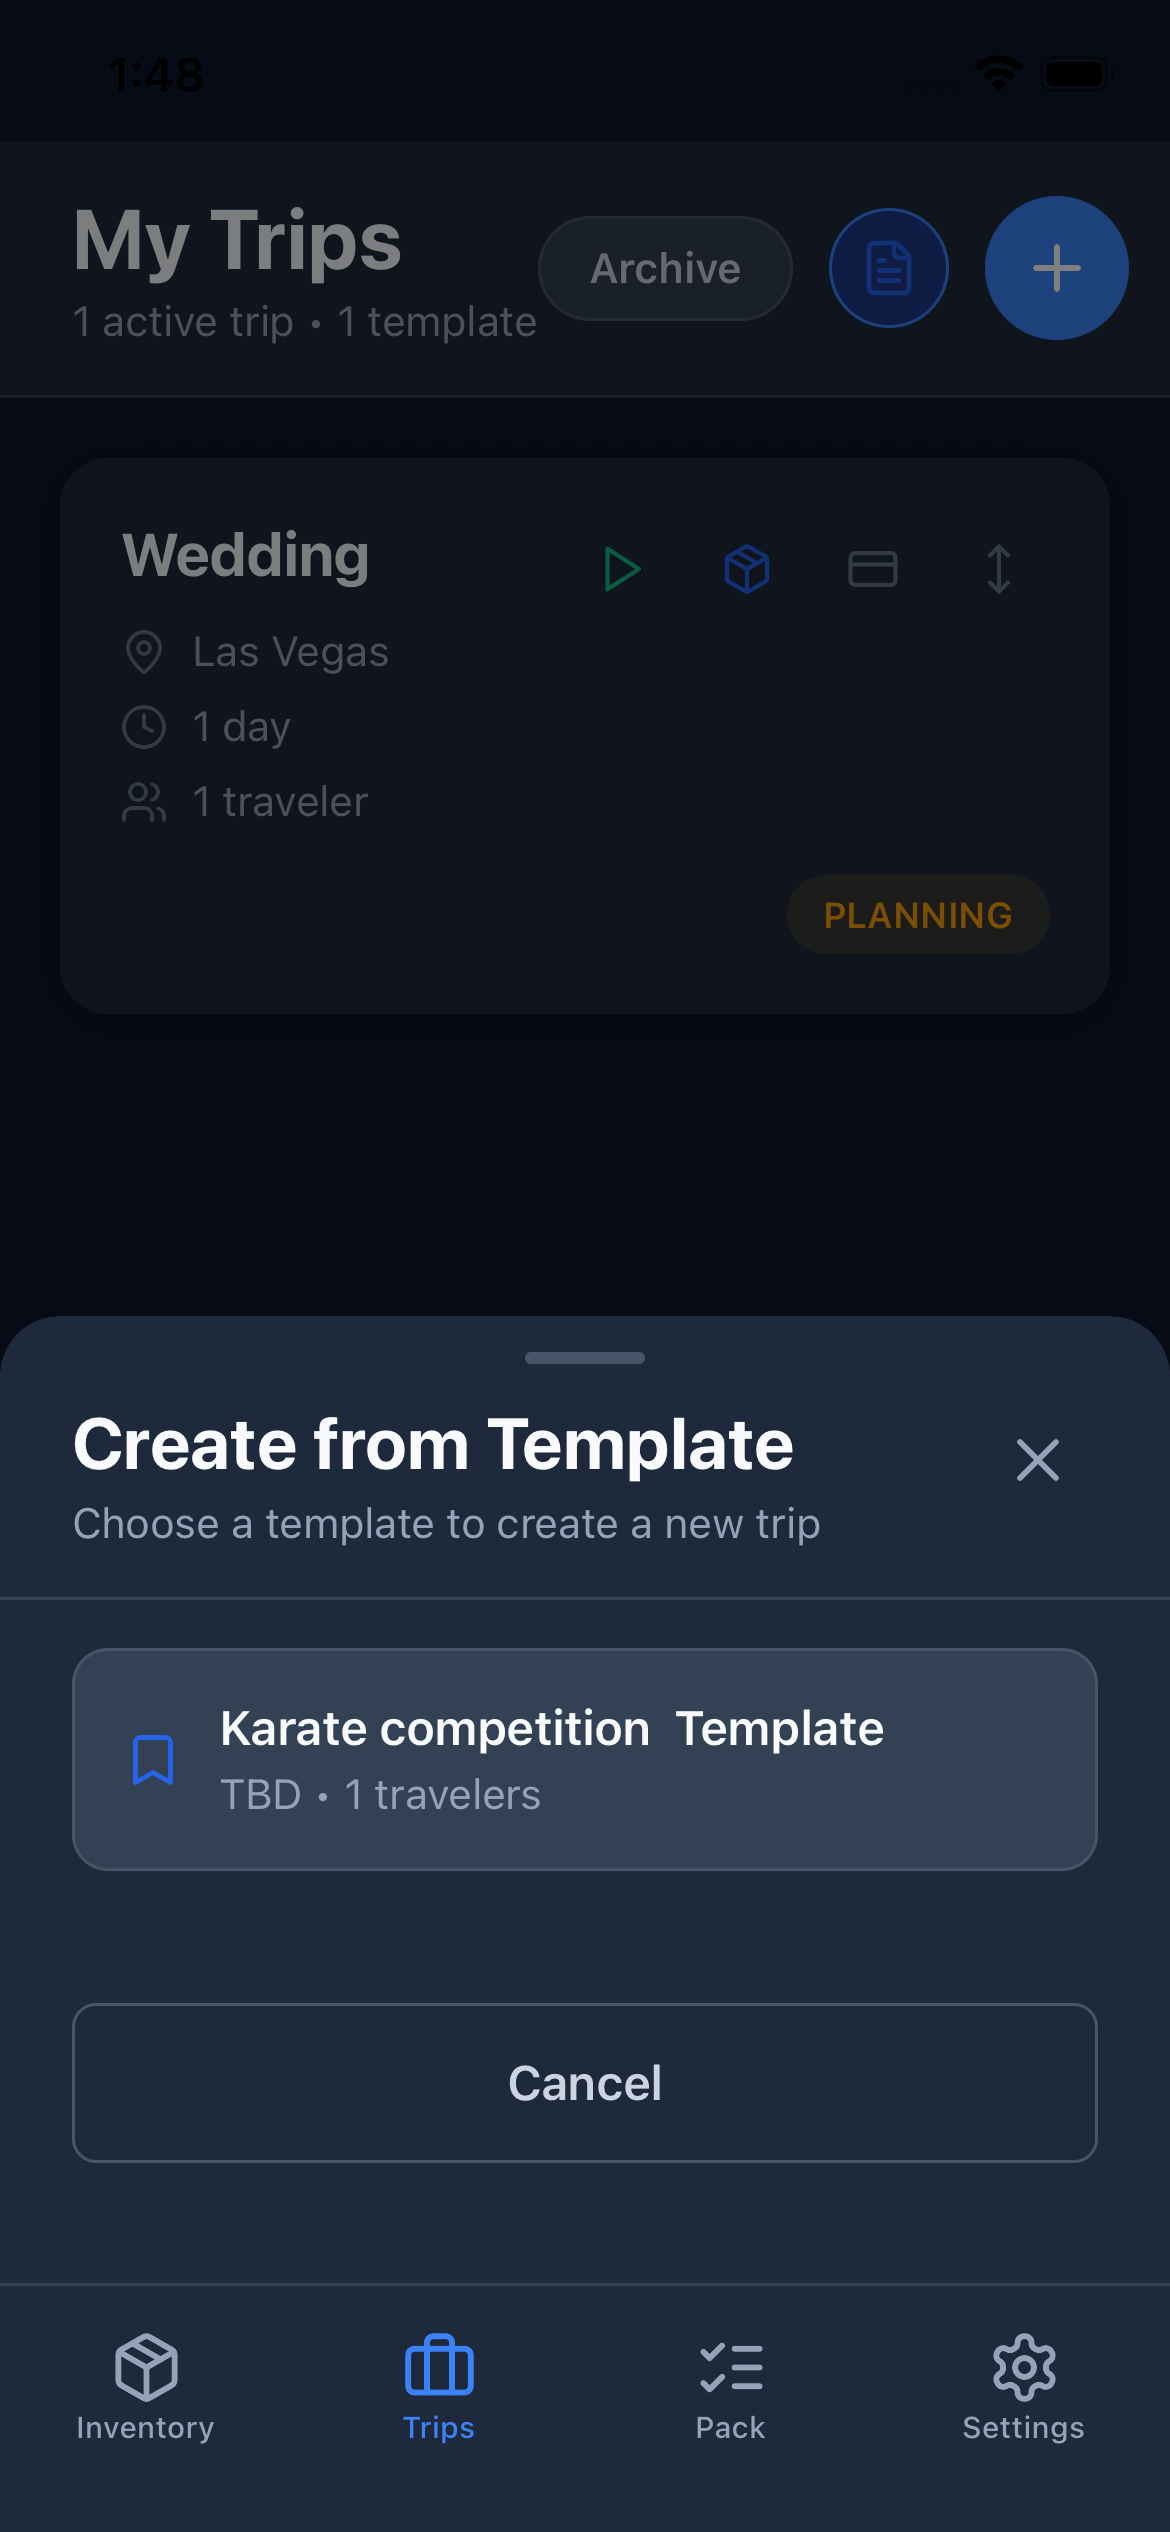
Templates let you save a packing list and reuse it for future trips. This is especially useful if you travel to the same destination regularly or always pack the same gear for a certain type of trip.Creating a Trip from a Template
- On the Trips tab, tap New Trip and then From Template.
- Select a template from the list.
- Edit the trip details (name, destination, dates).
- Tap Create.
Saving a Trip as a Template
- Open an existing trip.
- Tap the ⋯ (more) menu.
- Select Save as Template.
- Give the template a name.
- Tap Save.
Managing Templates
Templates appear in their own section of the Trips tab. You can:- Create a new trip from any template
- Delete a template you no longer need
Editing and Deleting a Trip
- Edit: Tap the ⋯ menu on any trip card and choose Edit.
- Delete: Tap the ⋯ menu and choose Delete. This removes the trip and its packing list permanently.