Adding an Item
- Open the Inventory tab.
- Tap the + button.
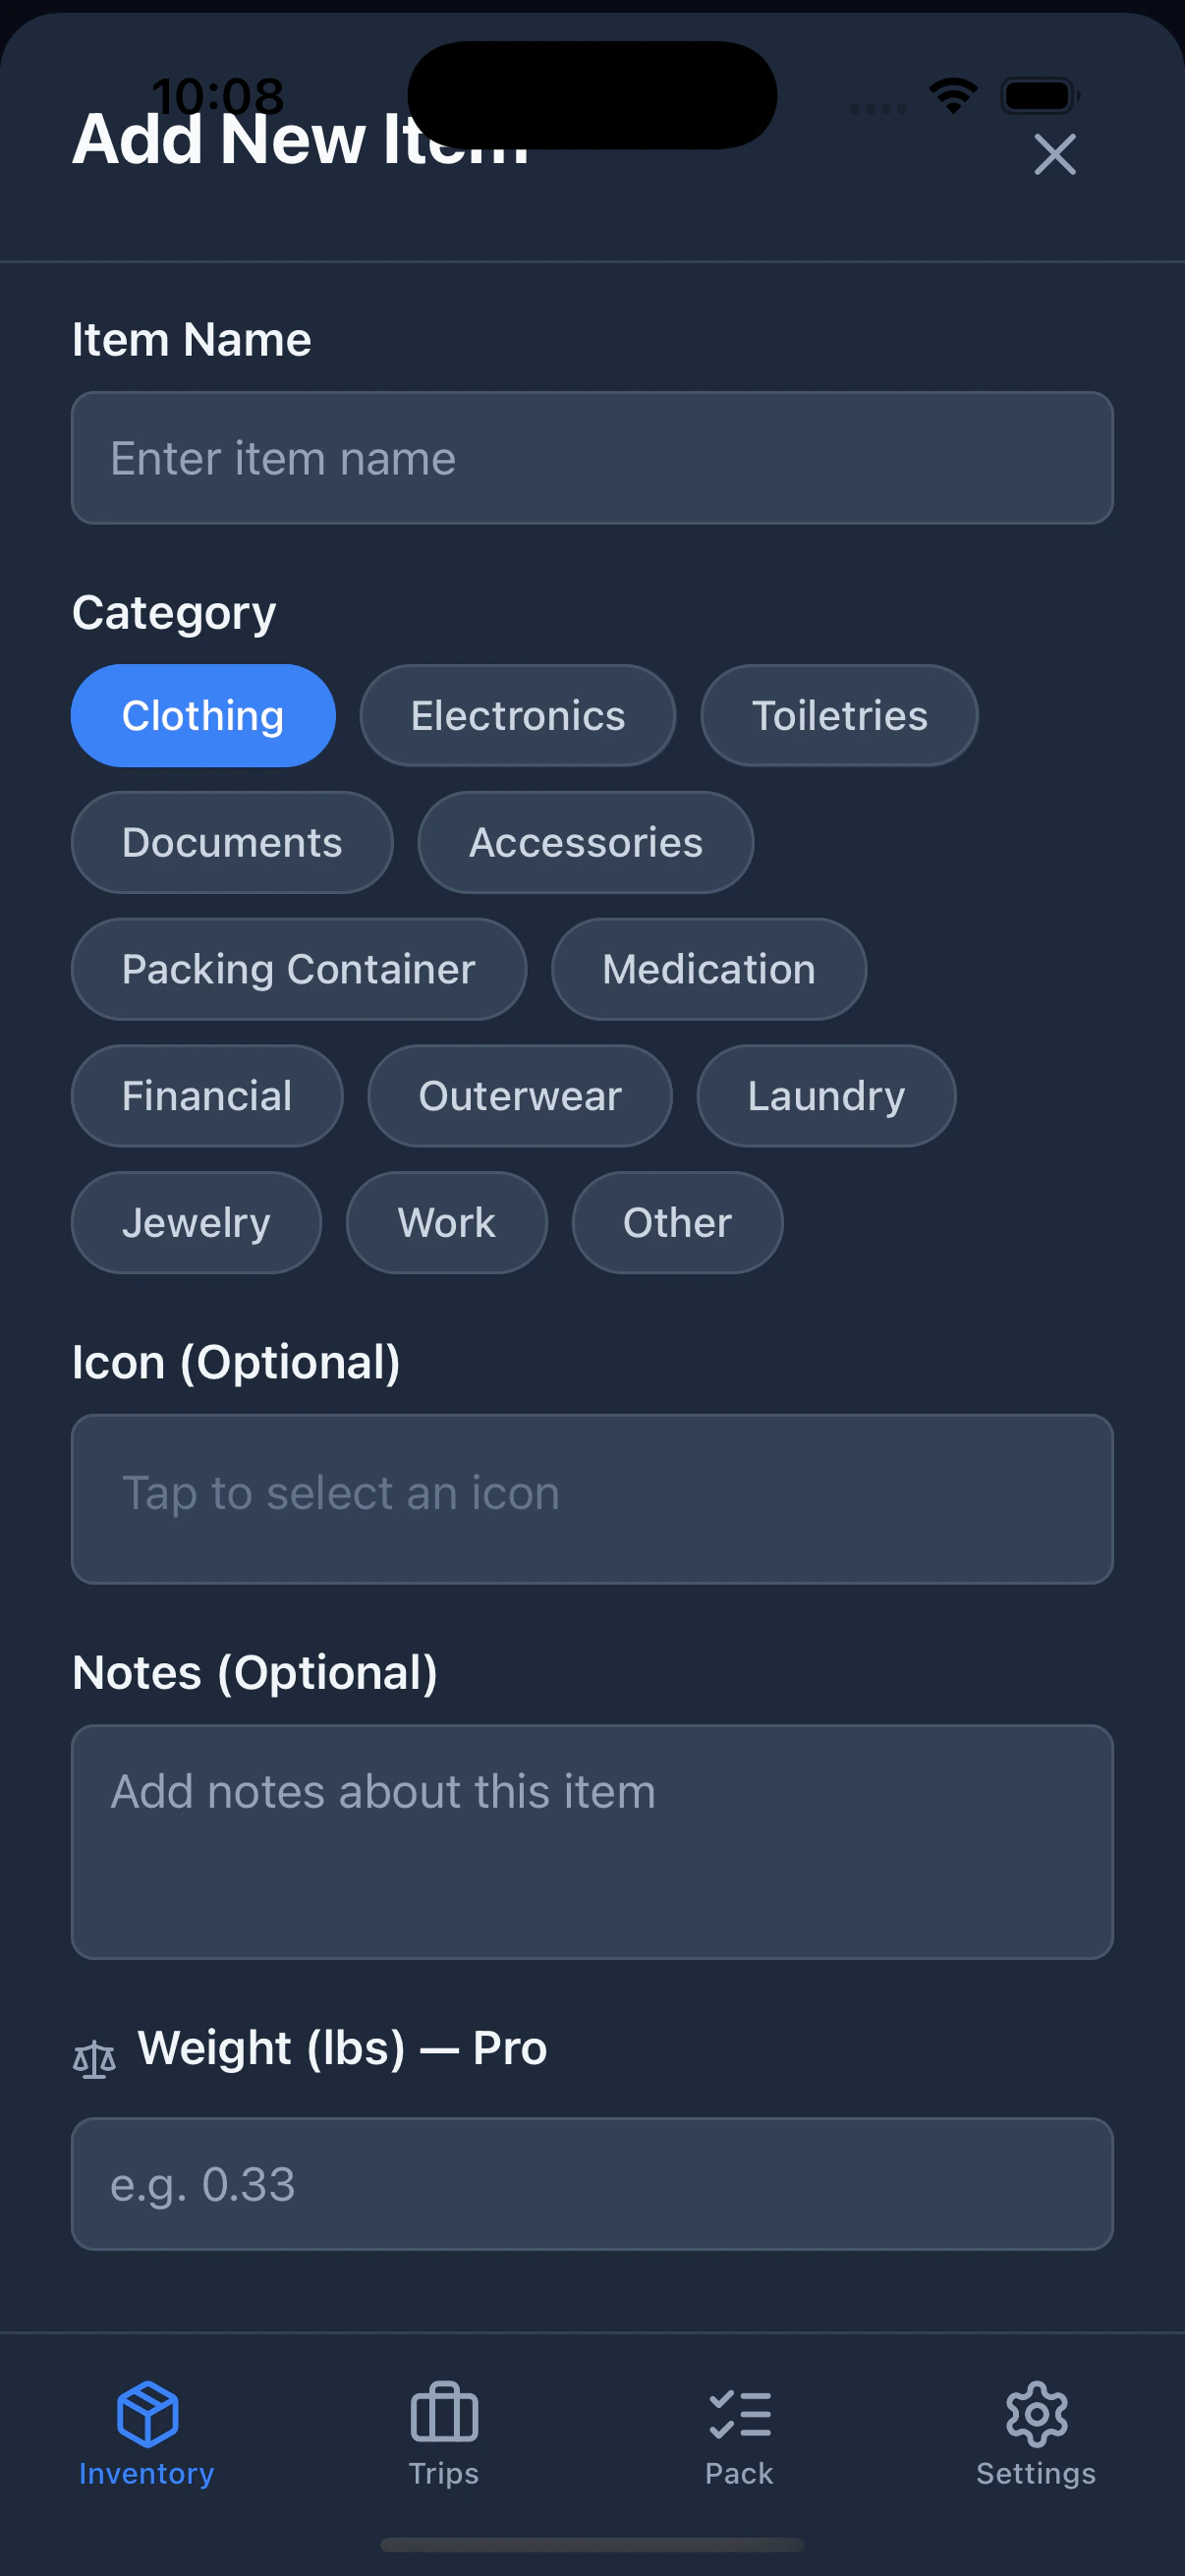
- Fill in the item details:
- Tap Add Item.
You can also add items directly to a specific category by tapping the + Add button next to any category header in the inventory list.
Adding Many Items at Once
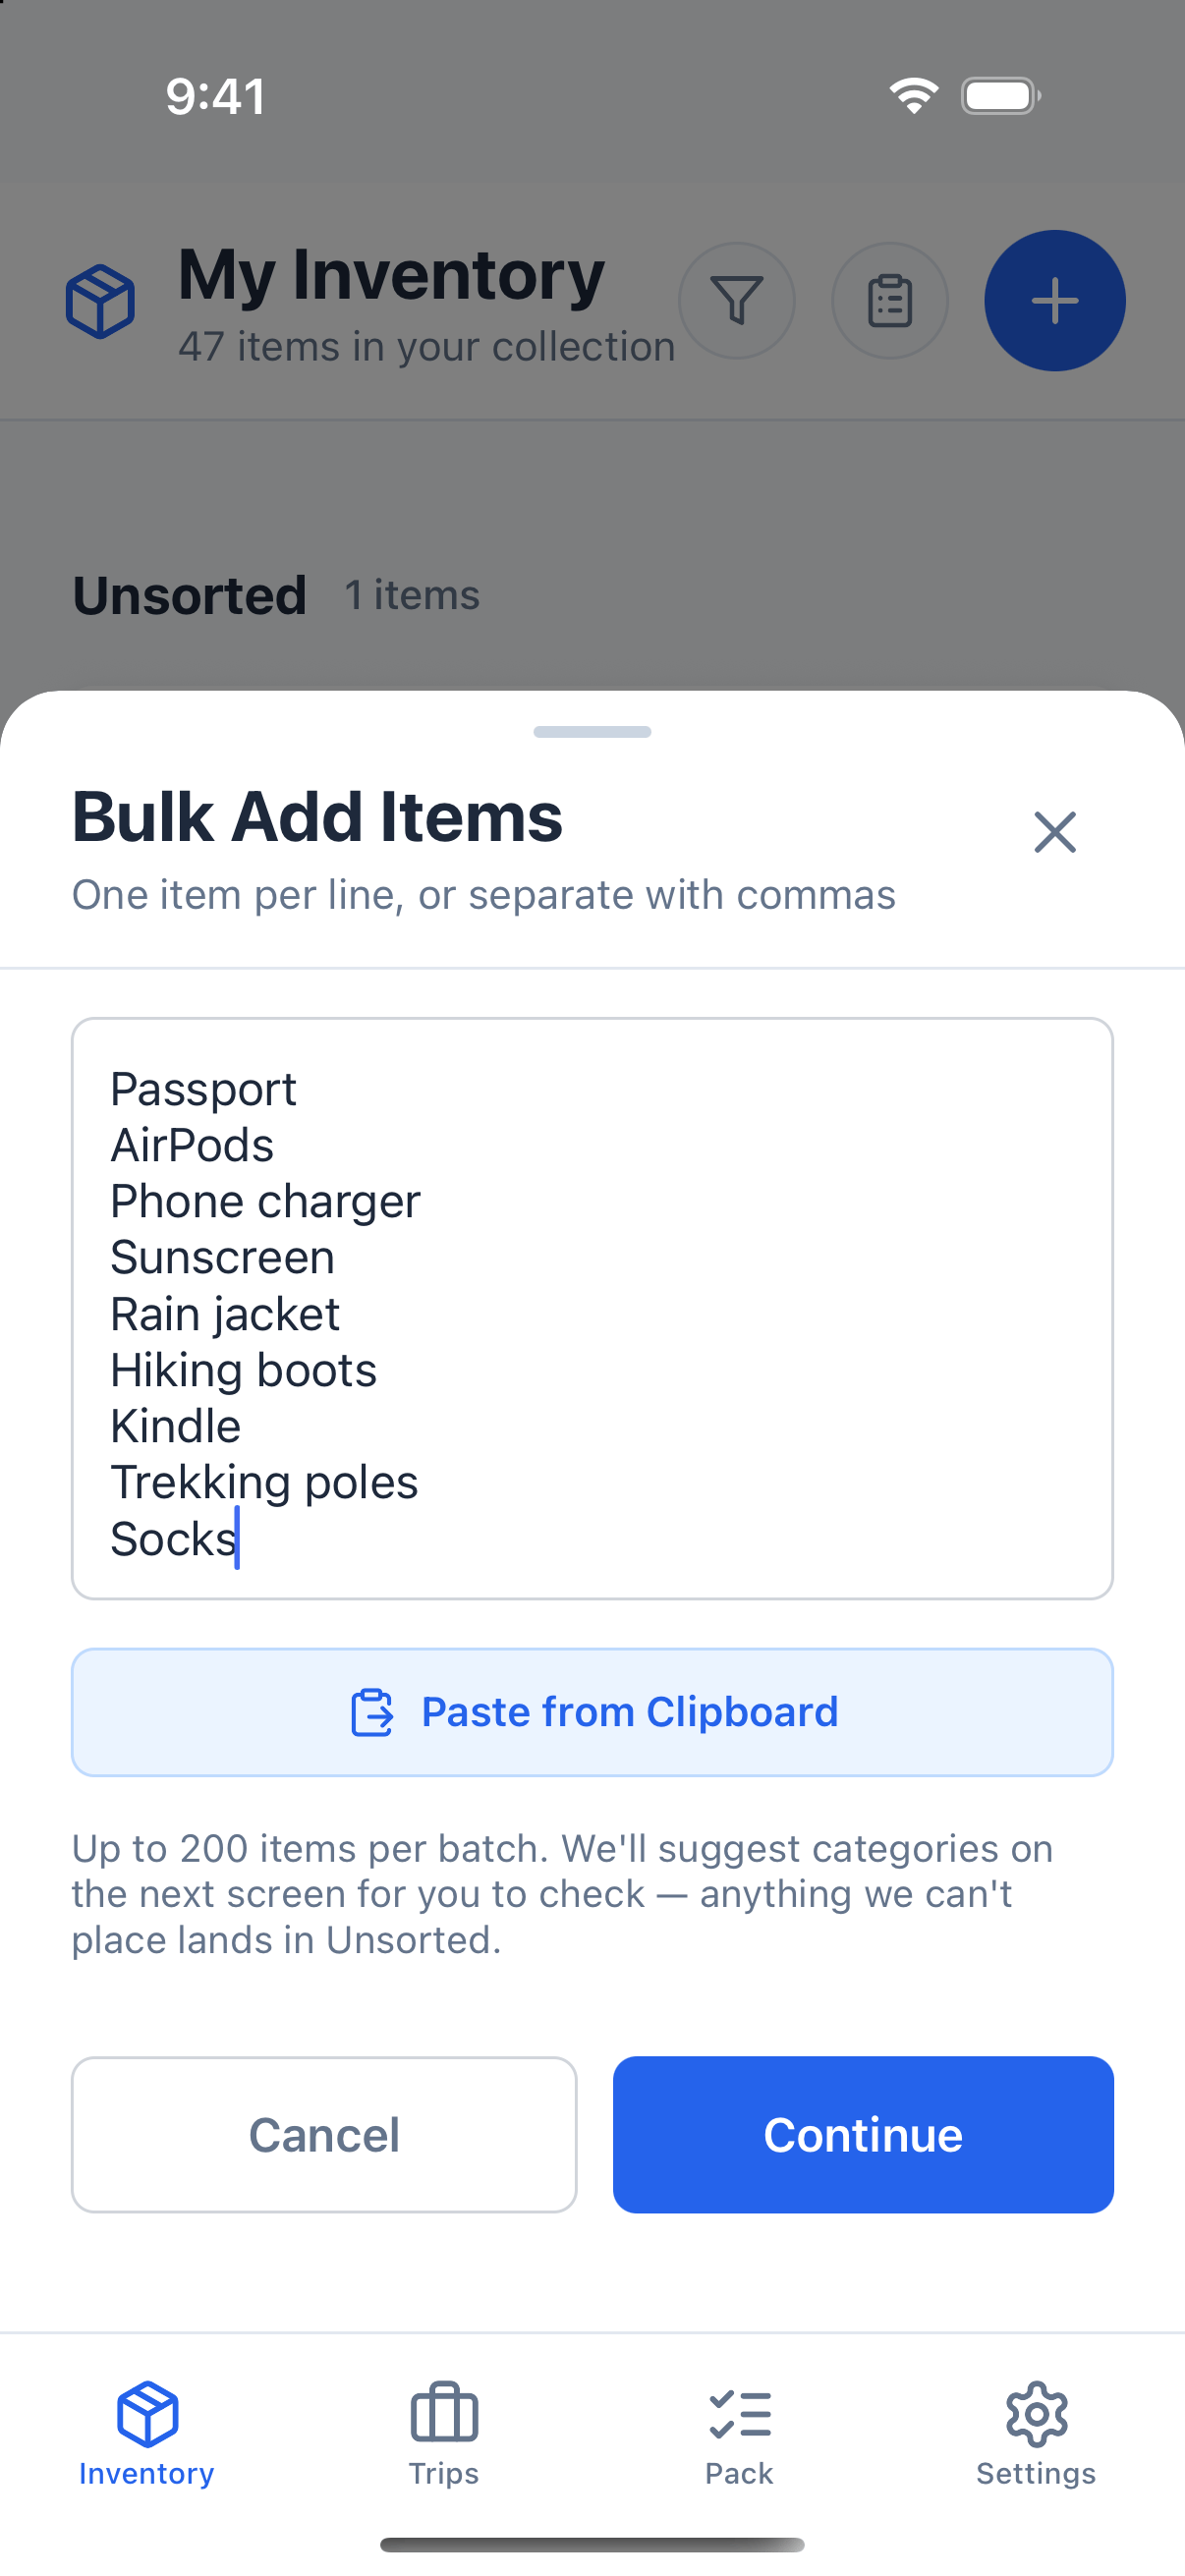
If you already keep a packing list somewhere else, such as in Notes or a spreadsheet, you can add the whole list in one go instead of typing each item.- Open the Inventory tab.
- Tap the bulk add button (the clipboard icon next to the filter button).
- Type your list, or tap Paste from Clipboard. Put one item on each line, or separate items with commas. You can add up to 200 items at a time, and a name that appears twice in your list is only added once.
- Tap Continue to review the list.
- Check each row and fix anything that’s wrong (see below).
- Tap Add Items. The button shows how many items will be added.
Reviewing the List
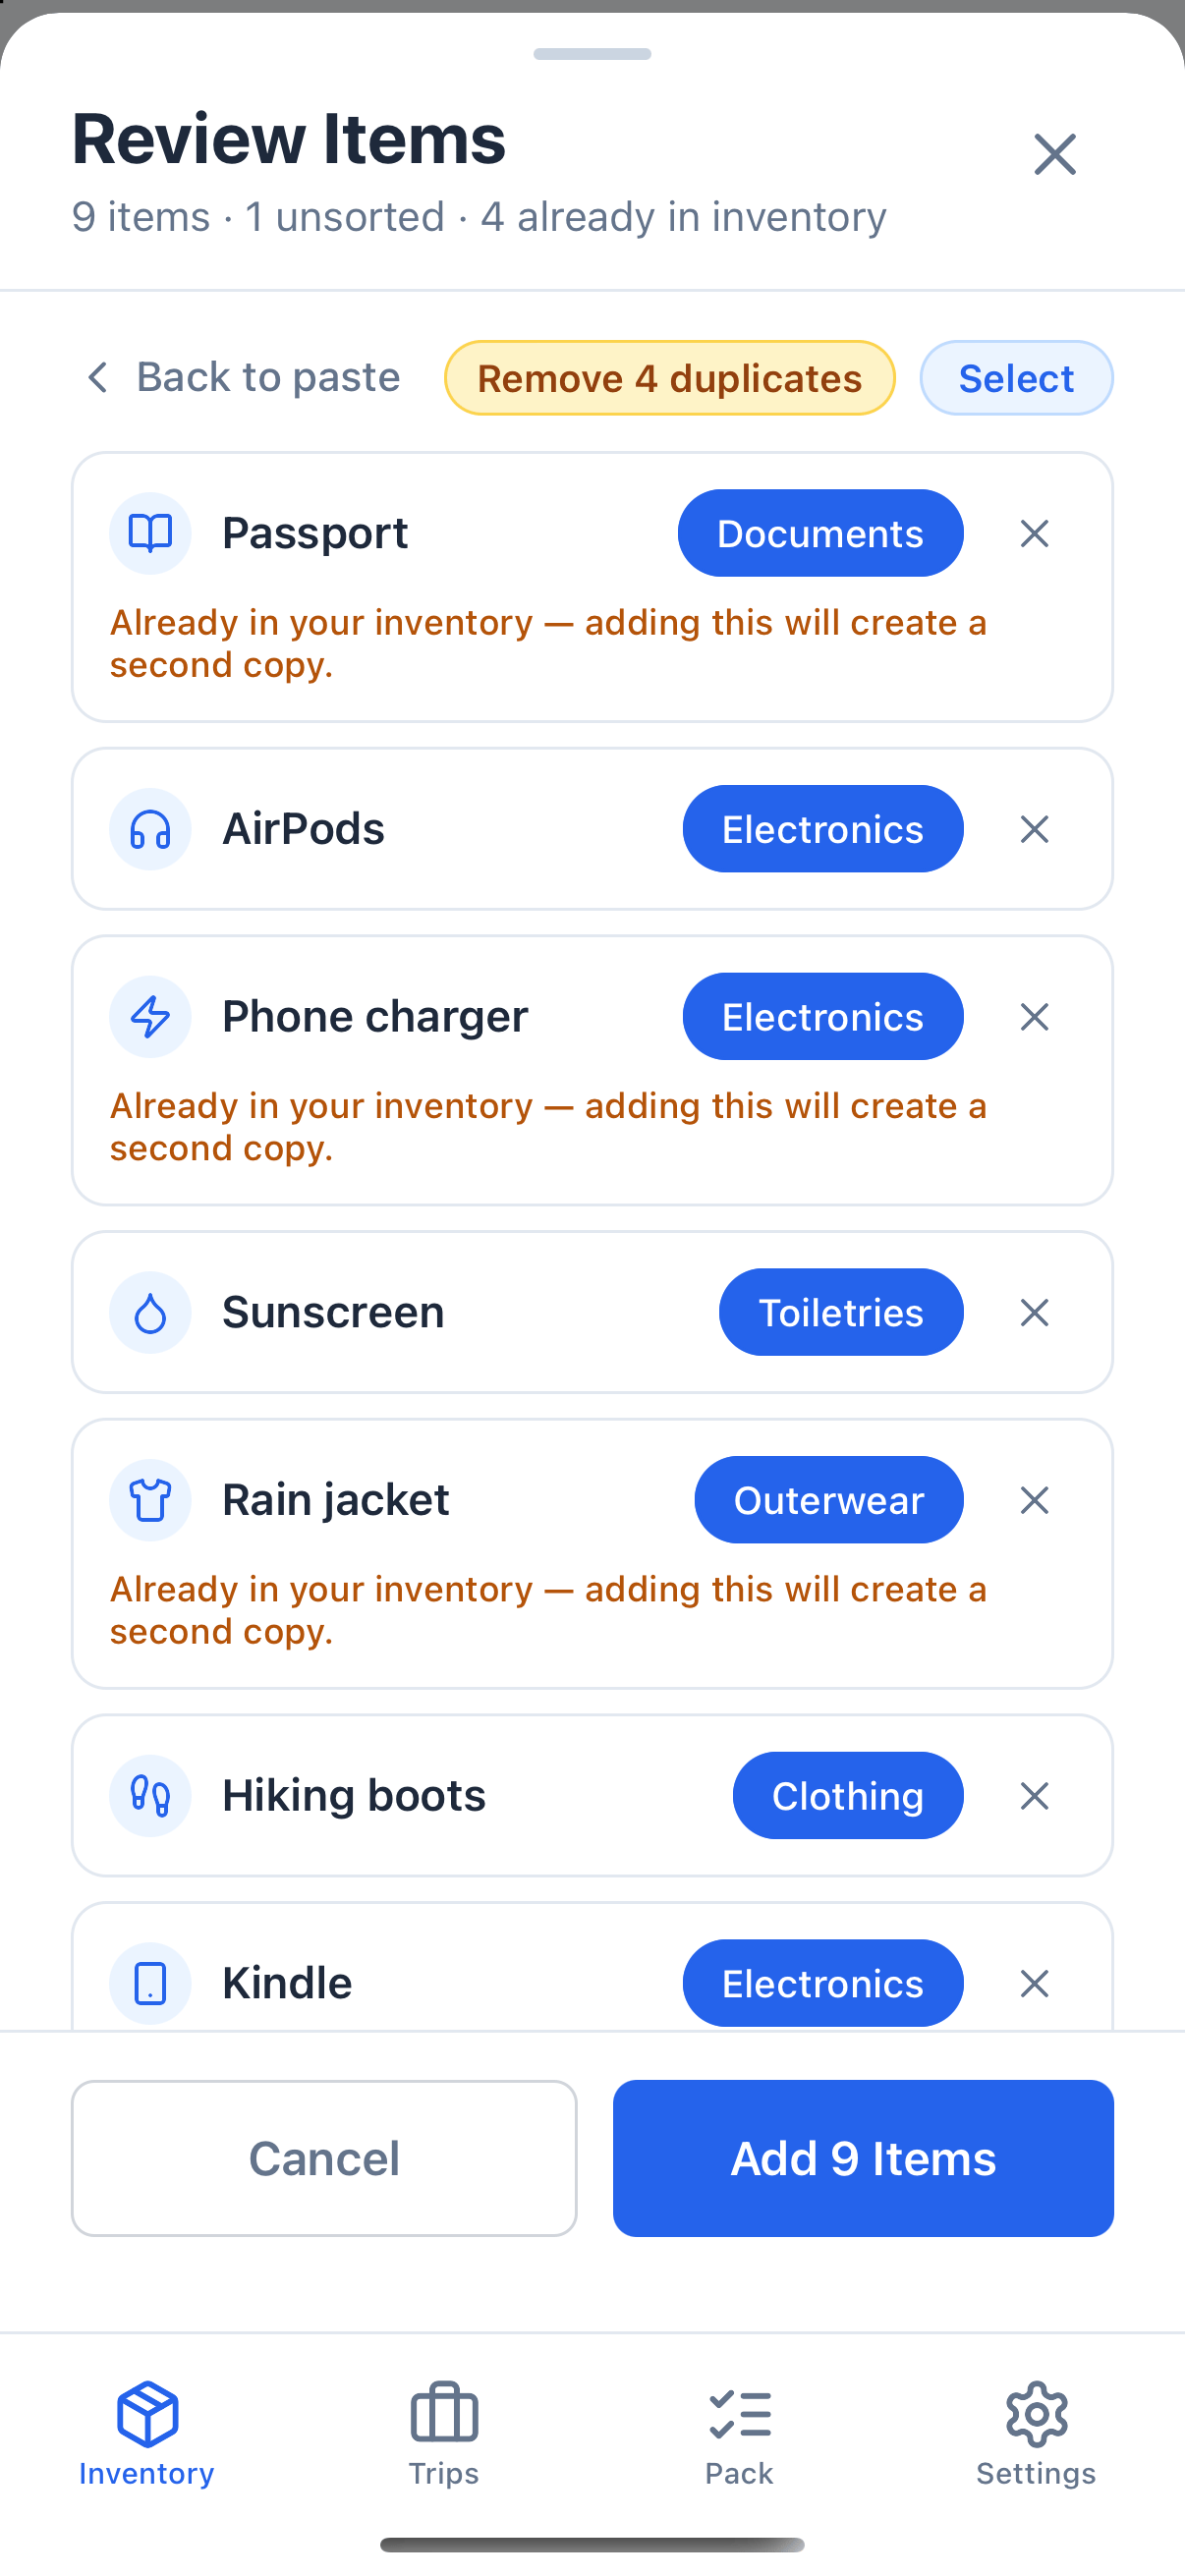
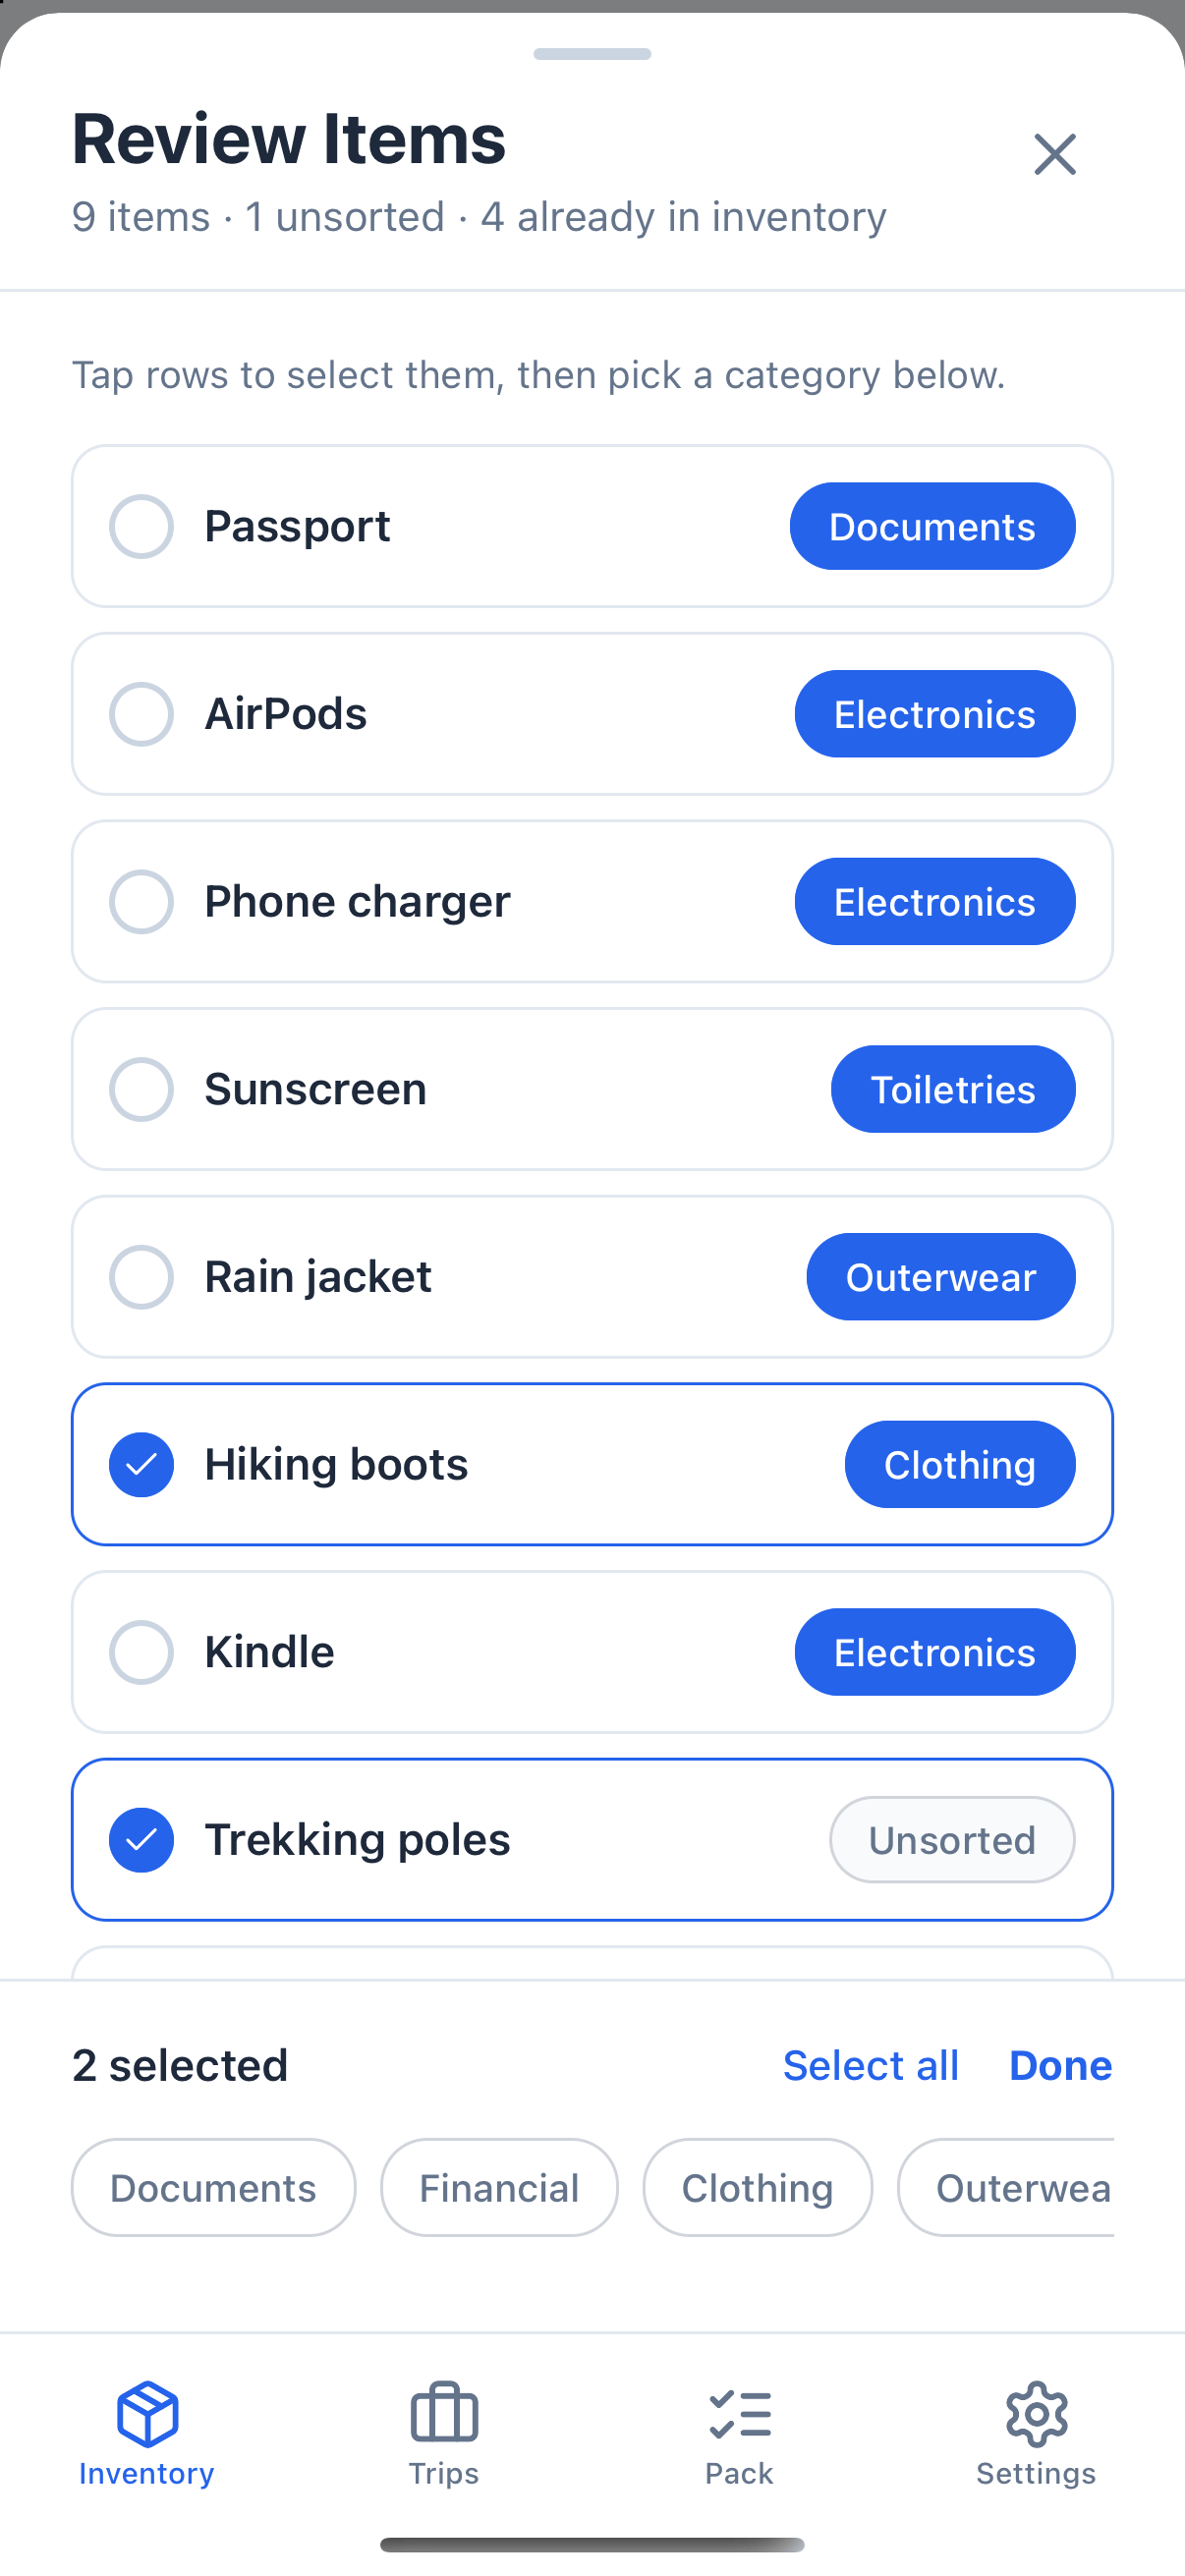
The review screen shows one row per item, with the category PackKit suggests for it. The summary at the top counts how many items are in the list, how many are Unsorted, and how many you already have.- Change a category: tap the category on the right of the row and pick another one. The row’s icon resets to a default for the new category.
- Change an icon: tap the icon on the left of the row.
- Remove a row: tap the × at the end of the row.
- Edit the list itself: tap Back to paste. Categories you’ve already set are kept for any names still in the list.
How Category Suggestions Work
PackKit suggests a category when it recognizes the item’s name, such as “Sunscreen” or “Rain jacket”. It also recognizes common electronics brands, such as AirPods, iPad, Kindle, GoPro and Nintendo Switch. Other brand names aren’t recognized yet. Suggestions are worked out on your phone. Your list is never sent anywhere to be categorized. A suggestion is only a starting point, and you can change any of them before adding. When PackKit doesn’t recognize a name, it doesn’t guess. The item is marked Unsorted so you can see it needs a category.Fixing Many Rows at Once
Lists are often grouped by type, so several rows tend to need the same fix.- On the review screen, tap Select. Any Unsorted rows start out selected.
- Tap rows to select or deselect them, or use Select all / Select none.
- Tap a category in the bar at the bottom. Every selected row moves to that category, and the screen leaves select mode.
Categories
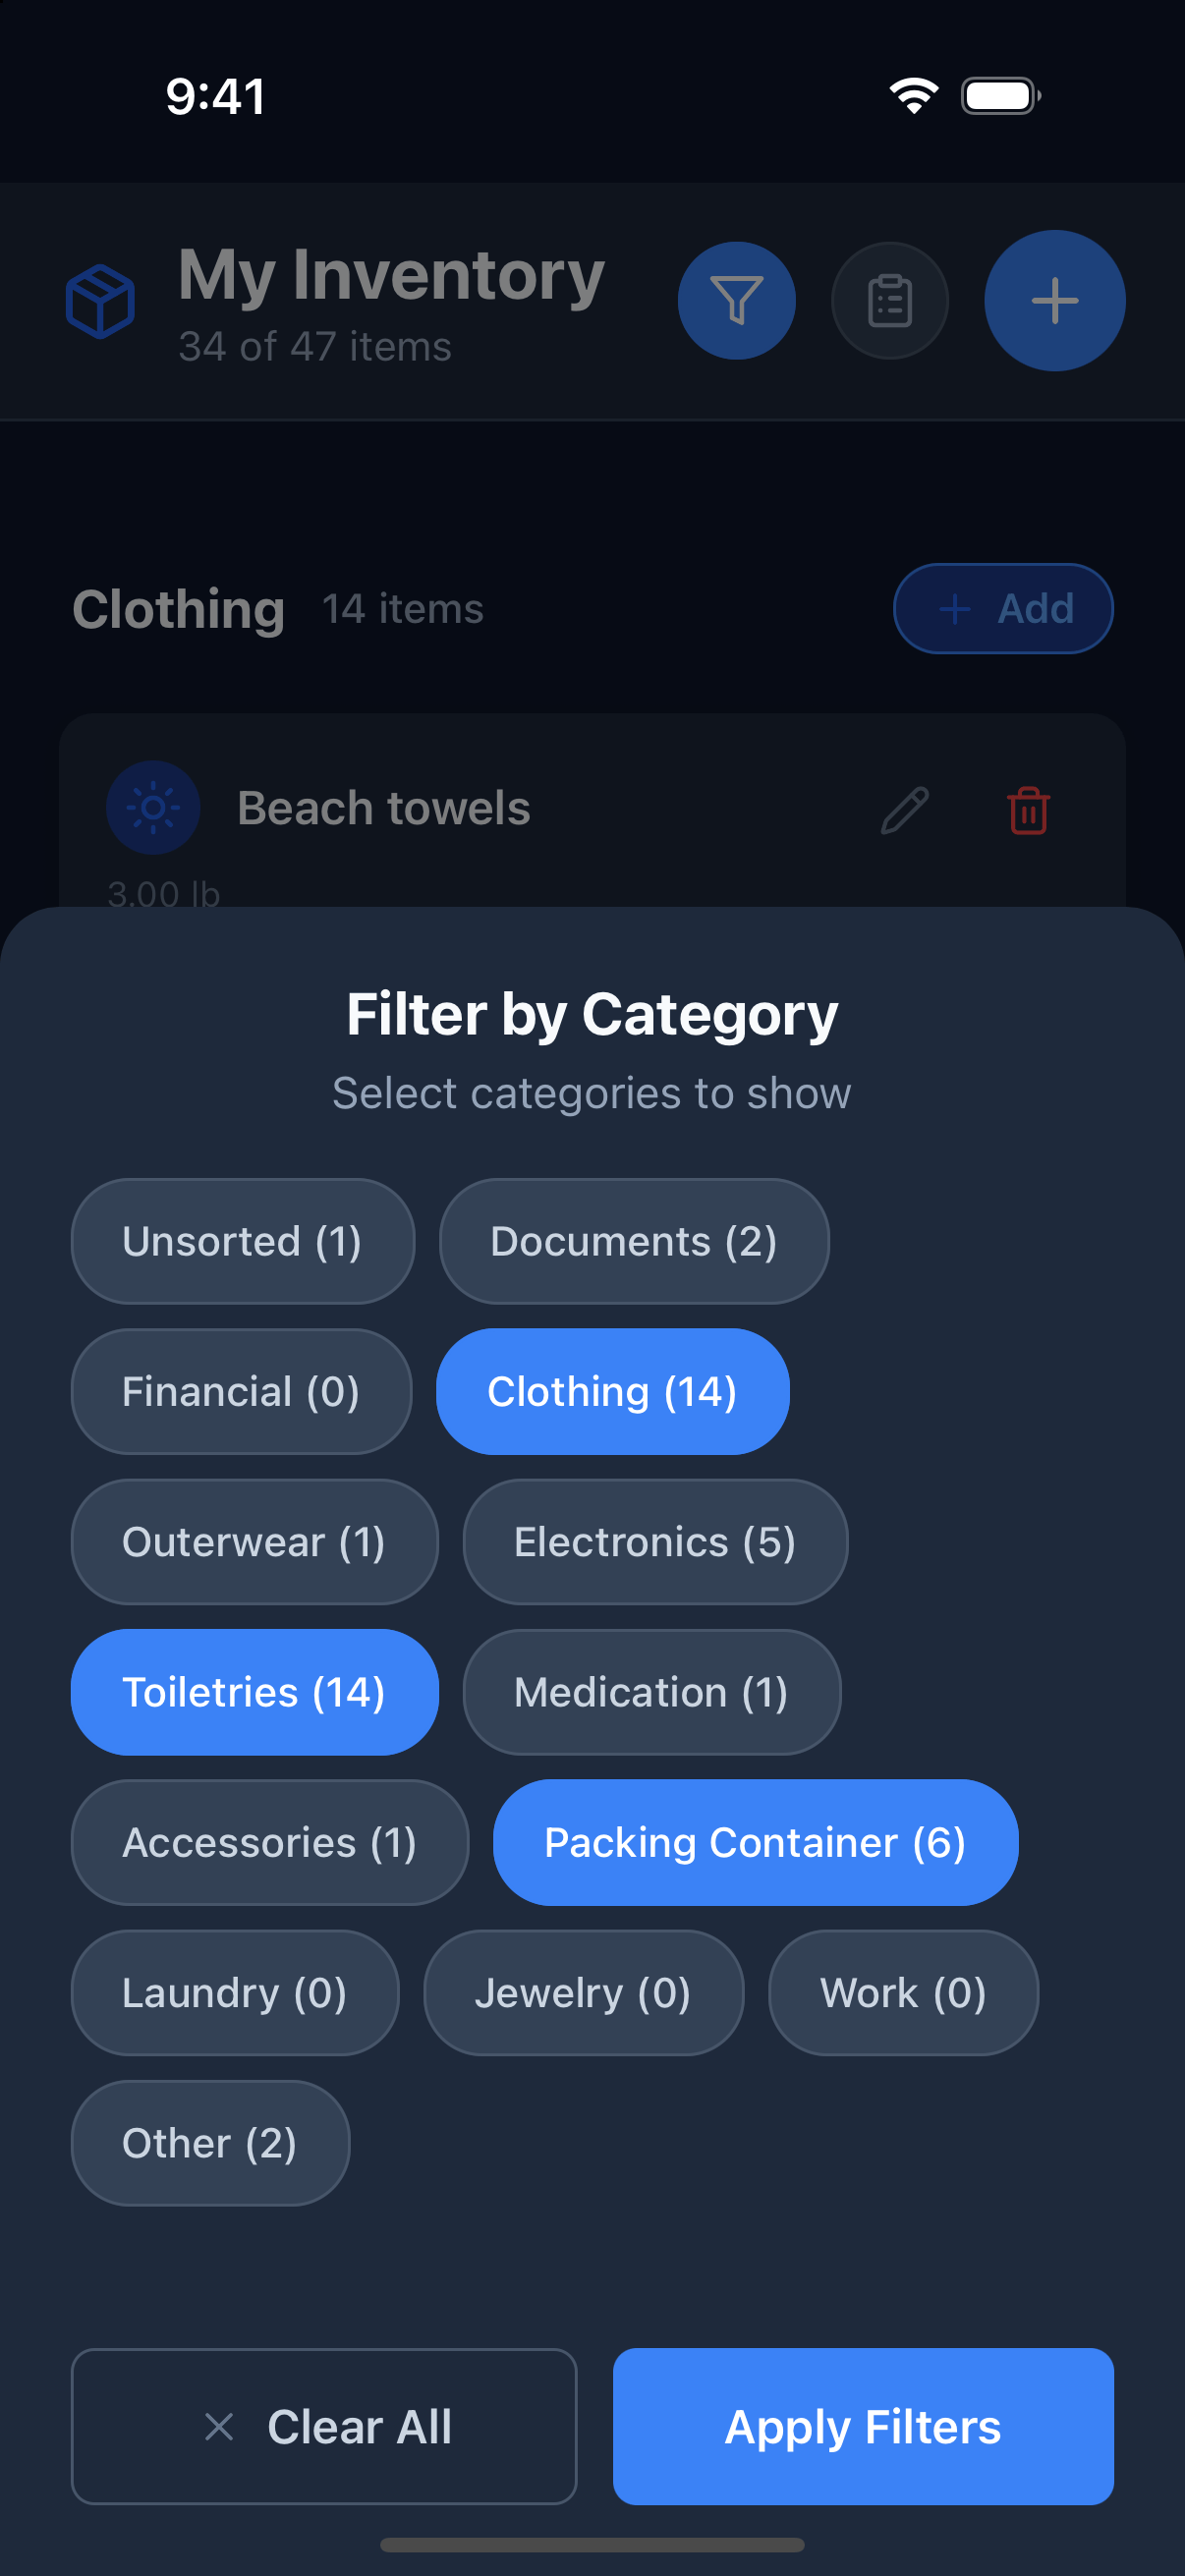
Categories group items in your inventory list. You can assign an item to any of these 13 categories: Documents, Financial, Clothing, Outerwear, Electronics, Toiletries, Medication, Accessories, Packing Container, Laundry, Jewelry, Work, and Other. Inventory sections and the filter modal use that same order.Unsorted
Unsorted is a reserved category for items that don’t have a category yet. It’s where bulk add puts any item it doesn’t recognize and that you didn’t assign a category to before adding. Unsorted items appear at the top of your inventory, and the filter modal lists Unsorted too. You can’t pick Unsorted yourself. To move an item out of it, tap the item’s pencil icon and choose a category.Packing Container is a special category. Items in this category can act as containers in your trips: suitcases, backpacks, packing cubes, or any bag within a bag. See Containers for details.
Choosing an Icon
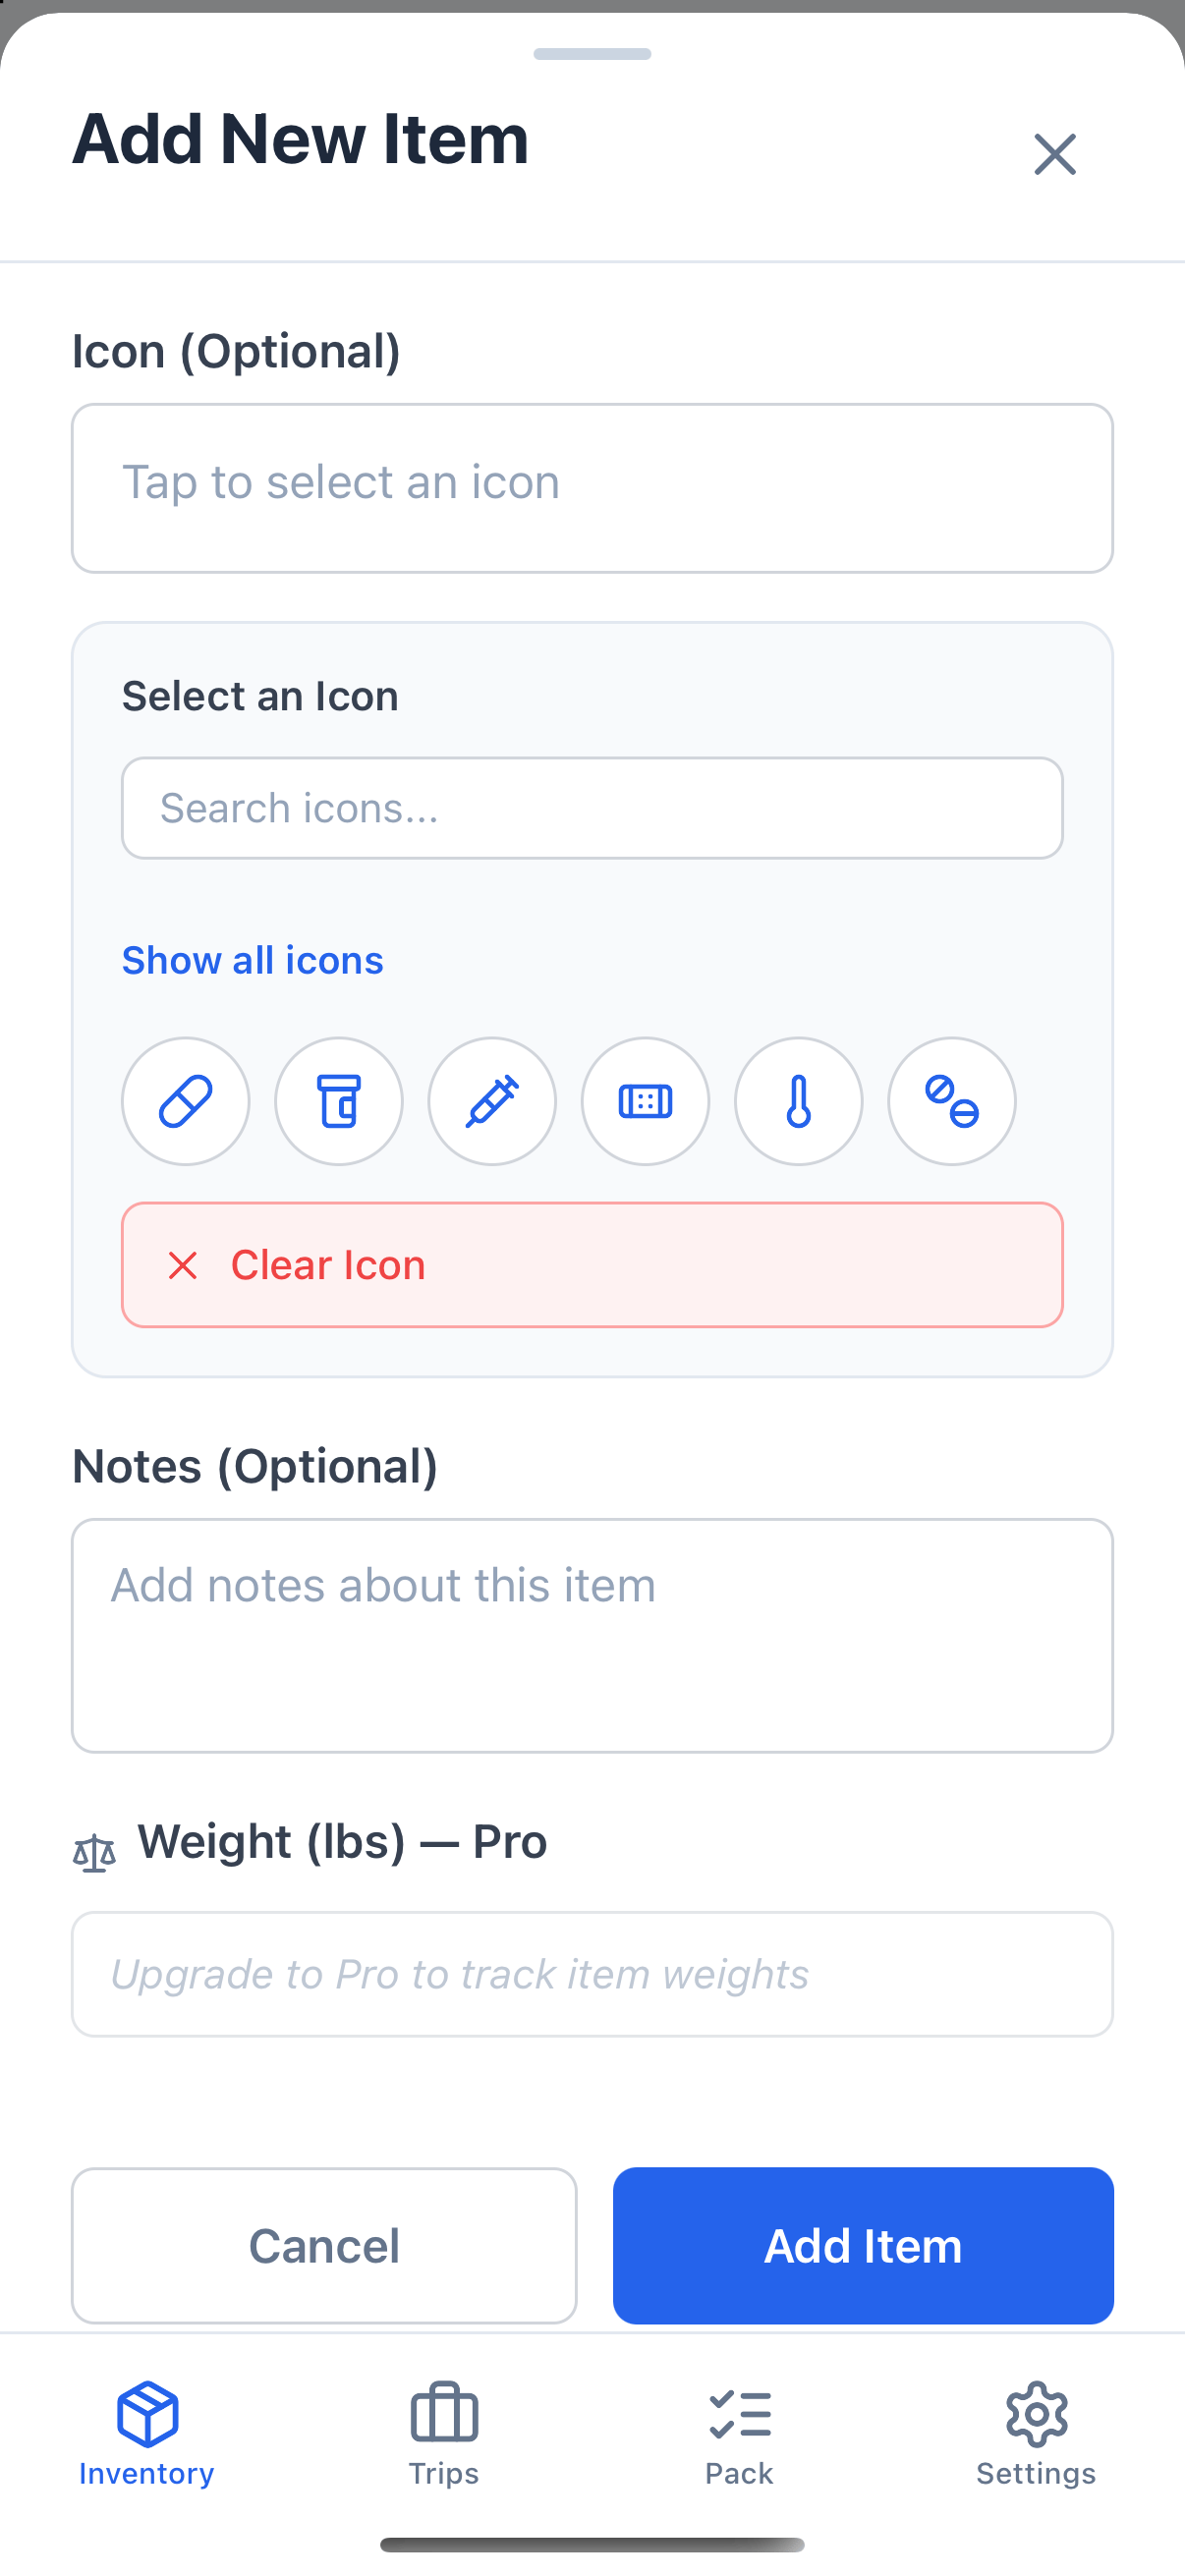
Each item can have an icon to make it easy to recognize at a glance.- Tap the icon button when creating or editing an item.
- The picker opens on the icons suggested for the item’s current Category, so you see a short, relevant list instead of the whole set. If the item already has an icon that isn’t in that list, it stays visible so your current choice is never hidden.
- Tap Show all icons to browse the full icon set, and Show category icons to go back to the suggestions.
- Use the search bar to find an icon by name (e.g., search “shirt” or “laptop”). Search always looks across every icon, not just the suggested ones.
- Tap an icon to select it.
The picker starts on the category suggestions each time you open it, and the Show all icons toggle is hidden while you are searching.
The Liquid Flag
Toggle Liquid on any item subject to TSA liquid rules or shipping restrictions. This flag is informational and appears as a visual indicator on the item in your packing list. Common examples: shampoo, contact solution, sunscreen, perfume.Editing an Item
Tap the pencil icon on the right side of any item to open the edit modal. Change any field and tap Update. Changes apply to the item everywhere it has been added to trips.Deleting an Item
Tap the red trash icon on the right side of any item to remove it permanently.Filtering
Tap the Filter button at the top of the Inventory tab to open the filter modal. You can select one or more categories. The list updates to show matching items and a count (“5 of 25 items”). Tap Clear All to reset filters. The filter button shows an active indicator when any filter is applied.